专栏名称: 计算机视觉研究院
主要由来自于大学的研究生组成的团队,本平台从事机器学习与深度学习领域,主要在人脸检测与识别,多目标检测研究方向。本团队想通过计算机视觉战队平台打造属于自己的品牌,让更多相关领域的人了解本团队,结识更多相关领域的朋友,一起来学习,共同进步!
目录
相关文章推荐
度房苏州  ·  园区散播谣言中介,已被依法刑拘! ·  昨天  
好地讯江苏  ·  2.26苏州土拍:龙湖补仓吴中主城,中电建拿 ... ·  2 天前  
好地讯江苏  ·  苏州狮山挂地1宗,楼面起价15586元/㎡, ... ·  3 天前  
卤猫  ·  夜晚跳舞的水仙个展见面会 ·  2 天前  
51好读  ›  专栏  ›  计算机视觉研究院

一行代码不用写,就可以训练、测试、使用模型,这个star量1.5k的项目帮你做到

计算机视觉研究院  · 公众号  ·  · 2020-10-14 08:00

正文

计算机视觉研究院专栏

作者:Edison_G

计算机视觉研究院
长按扫描二维码
关注我们 获取更多资讯

igel 是 GitHub 上的一个热门工具,基于 scikit-learn 构建,支持 sklearn 的所有机器学习功能,如回归、分类和聚类。用户无需编写一行代码即可使用机器学习模型,只要有 yaml 或 json 文件,来描述你想做什么即可。


一行代码不用写,就可以训练、测试和使用模型,还有这样的好事?
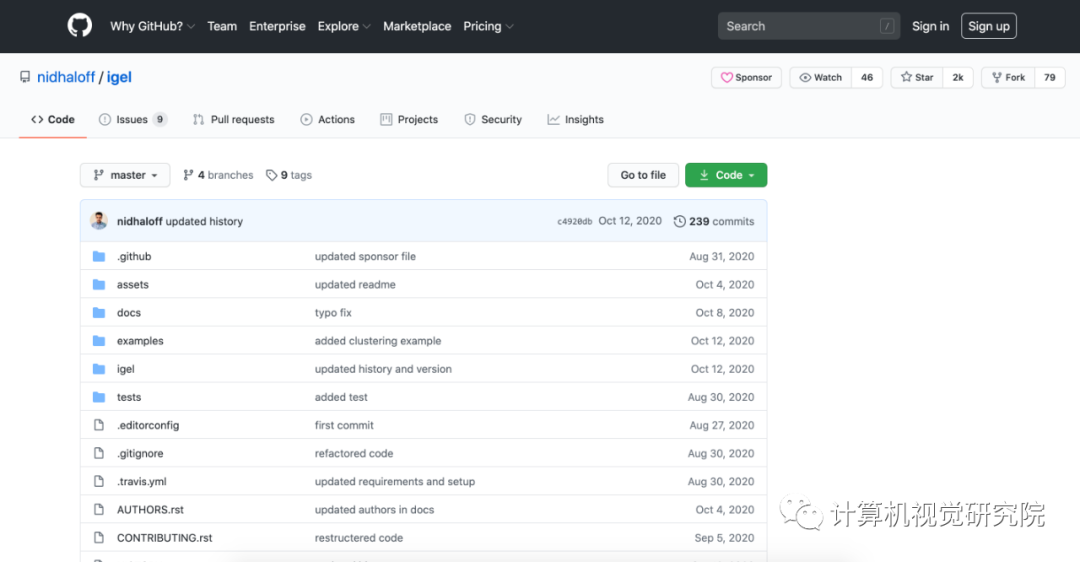
最近,软件工程师 Nidhal Baccouri 就在 GitHub 上开源了一个这样的机器学习 工具——igel,并登上了 GitHub 热榜。目前,该项目 star 量已有 1.5k。
项目地址: https://github.com/nidhaloff/igel
该项目旨在为每一个人(包括技术和非技术人员)提供使用 机器学习 的便捷方式。
项目作者这样描述创建 igel 的动机:「有时候我需要一个用来快速创建 机器学习 原型的工具,不管是进行概念验证还是创建快速 draft 模型。我发现自己经常为写样板代码或思考如何开始而犯愁。于是我决定创建 igel。」
igel 基于 scikit-learn 构建,支持 sklearn 的所有 机器学习 功能,如回归、分类和聚类 。用户无需编写一行代码即可使用 机器学习 模型,只要有 yaml 或 json 文件,来描述你想做什么即可。
其基本思路是在人类可读的 yaml 或 json 文件中将所有配置进行分组,包括模型定义、数据预处理方法等,然后让 igel 自动化执行一切操作。用户在 yaml 或 json 文件中描述自己的需求,之后 igel 使用用户的配置构建模型,进行训练,并给出结果和元数据。
igel 目前支持的所有配置如下所示:
# dataset operationsdataset:    type: csv  # [str] -> type of your dataset    read_data_options: # options you want to supply for reading your data (See the detailed overview about this in the next section)        sep:  # [str] -> Delimiter to use.        delimiter:  # [str] -> Alias for sep.        header:     # [int, list of int] -> Row number(s) to use as the column names, and the start of the data.        names:  # [list] -> List of column names to use        index_col: # [int, str, list of int, list of str, False] -> Column(s) to use as the row labels of the DataFrame,        usecols:    # [list, callable] -> Return a subset of the columns


        squeeze:    # [bool] -> If the parsed data only contains one column then return a Series.        prefix:     # [str] -> Prefix to add to column numbers when no header, e.g. ‘X’ for X0, X1, …        mangle_dupe_cols:   # [bool] -> Duplicate columns will be specified as ‘X’, ‘X.1’, …’X.N’, rather than ‘X’…’X’. Passing in False will cause data to be overwritten if there are duplicate names in the columns.        dtype:  # [Type name, dict maping column name to type] -> Data type for data or columns        engine:     # [str] -> Parser engine to use. The C engine is faster while the python engine is currently more feature-complete.        converters: # [dict] -> Dict of functions for converting values in certain columns. Keys can either be integers or column labels.        true_values: # [list] -> Values to consider as True.        false_values: # [list] -> Values to consider as False.        skipinitialspace: # [bool] -> Skip spaces after delimiter.        skiprows: # [list-like] -> Line numbers to skip (0-indexed) or number of lines to skip (int) at the start of the file.        skipfooter: # [int] -> Number of lines at bottom of file to skip        nrows: # [int] -> Number of rows of file to read. Useful for reading pieces of large files.        na_values: # [scalar, str, list, dict] ->  Additional strings to recognize as NA/NaN.        keep_default_na: # [bool] ->  Whether or not to include the default NaN values when parsing the data.        na_filter: # [bool] -> Detect missing value markers (empty strings and the value of na_values). In data without any NAs, passing na_filter=False can improve the performance of reading a large file.        verbose: # [bool] -> Indicate number of NA values placed in non-numeric columns.        skip_blank_lines: # [bool] -> If True, skip over blank lines rather than interpreting as NaN values.        parse_dates: # [bool, list of int, list of str, list of lists, dict] ->  try parsing the dates        infer_datetime_format: # [bool] -> If True and parse_dates is enabled, pandas will attempt to infer the format of the datetime strings in the columns, and if it can be inferred, switch to a faster method of parsing them.        keep_date_col: # [bool] -> If True and parse_dates specifies combining multiple columns then keep the original columns.        dayfirst: # [bool] -> DD/MM format dates, international and European format.        cache_dates: # [bool] -> If True, use a cache of unique, converted dates to apply the datetime conversion.        thousands: # [str] -> the thousands operator        decimal: # [str] -> Character to recognize as decimal point (e.g. use ‘,’ for European data).        lineterminator: # [str] -> Character to break file into lines.        escapechar: # [str] ->  One-character string used to escape other characters.        comment: # [str] -> Indicates remainder of line should not be parsed. If found at the beginning of a line, the line will be ignored altogether. This parameter must be a single character.        encoding: # [str] -> Encoding to use for UTF when reading/writing (ex. ‘utf-8’).        dialect: # [str, csv.Dialect] -> If provided, this parameter will override values (default or not) for the following parameters: delimiter, doublequote, escapechar, skipinitialspace, quotechar, and quoting        delim_whitespace: # [bool] -> Specifies whether or not whitespace (e.g. ' ' or '    ') will be used as the sep        low_memory: # [bool] -> Internally process the file in chunks, resulting in lower memory use while parsing, but possibly mixed type inference.        memory_map: # [bool] -> If a filepath is provided for filepath_or_buffer, map the file object directly onto memory and access the data directly from there. Using this option can improve performance because there is no longer any I/O overhead.

split: # split options test_size: 0.2 #[float] -> 0.2 means 20% for the test data, so 80% are automatically for training shuffle: true # [bool] -> whether to shuffle the data before/while splitting stratify: None # [list, None] -> If not None, data is split in a stratified fashion, using this as the class labels.
preprocess: # preprocessing options missing_values: mean # [str] -> other possible values: [drop, median, most_frequent, constant] check the docs for more encoding: type: oneHotEncoding # [str] -> other possible values: [labelEncoding] scale: # scaling options method: standard # [str] -> standardization will scale values to have a 0 mean and 1 standard deviation | you can also try minmax target: inputs # [str] -> scale inputs. | other possible values: [outputs, all] # if you choose all then all values in the dataset will be scaled

# model definitionmodel: type: classification # [str] -> type of the problem you want to solve. | possible values: [regression, classification, clustering] algorithm: NeuralNetwork # [str (notice the pascal case)] -> which algorithm you want to use. | type igel algorithms in the Terminal to know more arguments: # model arguments: you can check the available arguments for each model by running igel help in your terminal use_cv_estimator: false # [bool] -> if this is true, the CV class of the specific model will be used if it is supported cross_validate: cv: # [int] -> number of kfold (default 5) n_jobs: # [signed int] -> The number of CPUs to use to do the computation (default None) verbose: # [int] -> The verbosity level. (default 0) hyperparameter_search: method: grid_search # method you want to use: grid_search and random_search are supported parameter_grid: # put your parameters grid here that you want to use, an example is provided below param1: [val1, val2] param2: [val1, val2] arguments: # additional arguments you want to provide for the hyperparameter search cv: 5 # number of folds refit: true # whether to refit the model after the search return_train_score: false # whether to return the train score verbose: 0 # verbosity level
# target you want to predicttarget: # list of strings: basically put here the column(s), you want to predict that exist in your csv dataset - put the target you want to predict here - you can assign many target if you are making a multioutput prediction
这款工具具备以下特性:
  • 支持所有机器学习 SOTA 模型(甚至包括预览版模型);

  • 支持不同的数据预处理方法;

  • 既能写入配置文件,又能提供灵活性和数据控制;

  • 支持交叉验证;

  • 支持 yaml 和 json 格式;

  • 支持不同的 sklearn 度量,进行回归、分类和聚类;

  • 支持多输出 / 多目标回归和分类;

  • 在并行模型构建时支持多处理。

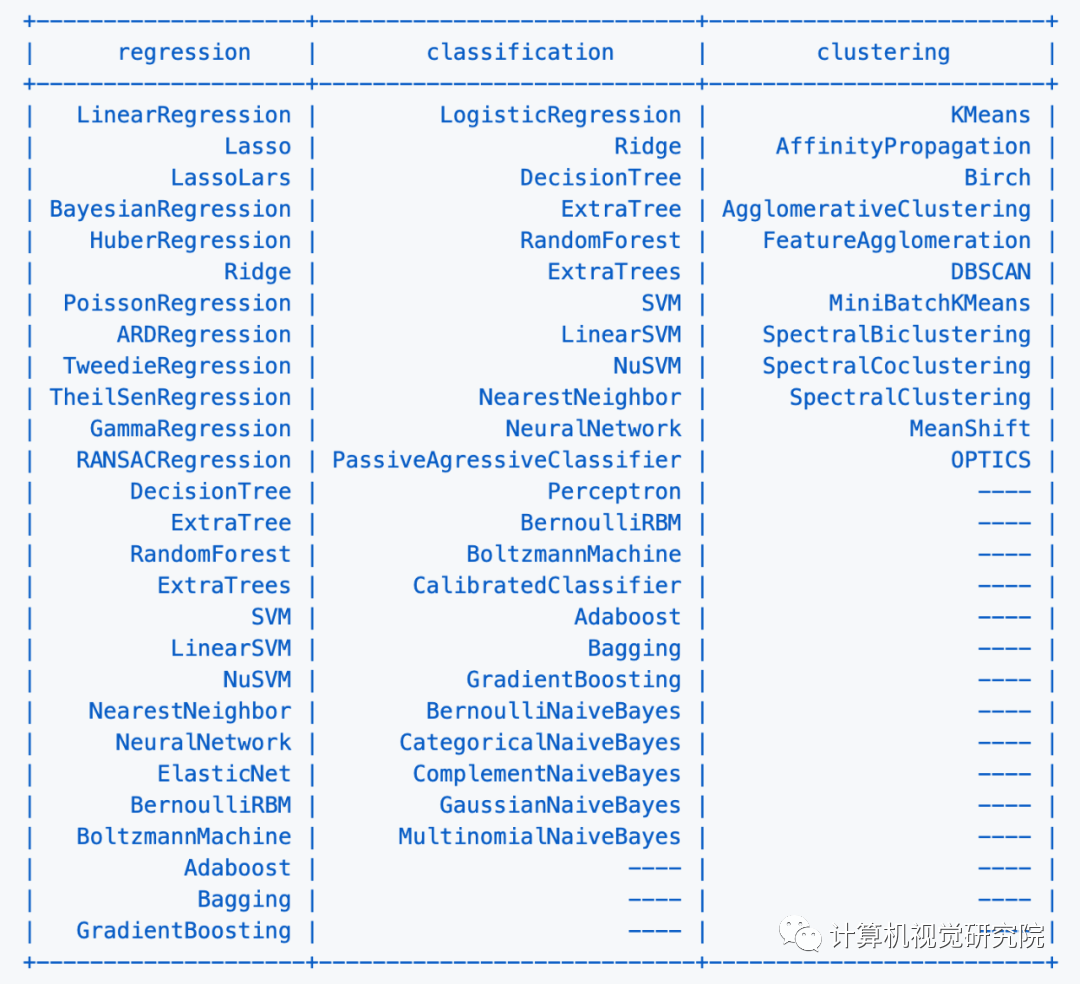
如前所示,igel 支持回归、分类和聚类 模型,包括我们熟悉的线性回归 、贝叶斯回归、支持向量机 、Adaboost、梯度提升 等。

igel 支持的回归、分类和聚类 模型。
快速入门
为了让大家快速上手 igel,项目作者在「README」文件中提供了详细的入门指南。
运行以下命令可以获取 igel 的帮助信息:
$ igel --help
# or just
$ igel -h"""Take some time and read the output of help command. You ll save time later if you understand how to use igel."""

第一步是提供一份 yaml 文件(你也可以使用 json)。你可以手动创建一个. yaml 文件并自行编辑。但如何你很懒,也可以选择使用 igel init 命令来快速启动:

"""igel init possible optional args are: (notice that these args are optional, so you can also just run igel init if you want)-type: regression, classification or clustering-model: model you want to use-target: target you want to predict

Example:If I want to use neural networks to classify whether someone is sick or not using the indian-diabetes dataset,then I would use this command to initialize a yaml file:$ igel init -type "classification" -model "NeuralNetwork" -target "sick""""$ igel init
运行该命令之后,当前的工作目录中就有了一个 igel.yaml 文档。你可以检查这个文件并进行修改,也可以一切从头开始。

在下面这个例子中,作者使用随机森林 来判断一个人是否患有糖尿病。他用到的数据集是著名的「Pima Indians Diabetes Database」。
# model definitionmodel:    # in the type field, you can write the type of problem you want to solve. Whether regression, classification or clustering    # Then, provide the algorithm you want to use on the data. Here I'm using the random forest algorithm    type: classification    algorithm: RandomForest     # make sure you write the name of the algorithm in pascal case    arguments:        n_estimators: 100   # here, I set the number of estimators (or trees) to 100        max_depth: 30       # set the max_depth of the tree
# target you want to predict# Here, as an example, I'm using the famous indians-diabetes dataset, where I want to predict whether someone have diabetes or not.# Depending on your data, you need to provide the target(s) you want to predict heretarget: - sick
注意,作者将 n_estimators 和 max_depth 传递给了模型,用作模型的附加参数 。如果你不提供 参数 ,模型就会使用默认 参数 。你不需要记住每个模型的 参数 。相反,你可以在终端运行 igel models 进入交互模式。在交互模式下,系统会提示你输入你想要使用的模型以及你想要解决的问题的类型。接下来,Igel 将展示出有关模型的信息和链接。通过该链接,你可以看到可用 参数 列表以及它们的使用方法。
igel 的使用方式应该是从终端(igel CLI):
在终端运行以下命令来拟合 / 训练模型,你需要提供数据集和 yaml 文件的路径。
$ igel fit --data_path 'path_to_your_csv_dataset.csv' --yaml_file 'path_to_your_yaml_file.yaml'
# or shorter
$ igel fit -dp 'path_to_your_csv_dataset.csv' -yml 'path_to_your_yaml_file.yaml'
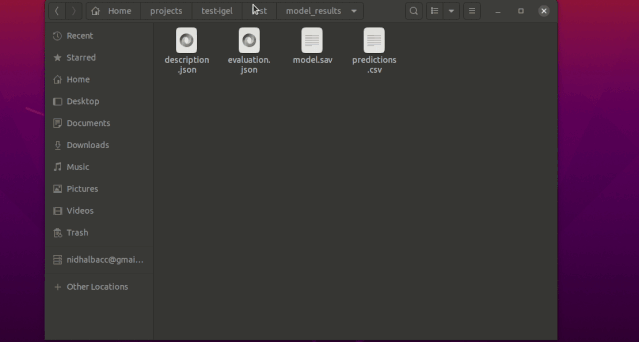
"""That's it. Your "trained" model can be now found in the model_results folder(automatically created for you in your current working directory).Furthermore, a description can be found in the description.json file inside the model_results folder."""

接下来,你可以评估训练 / 预训练好的模型:
$ igel evaluate -dp 'path_to_your_evaluation_dataset.csv'"""This will automatically generate an evaluation.json file in the current directory, where all evaluation results are stored"""

如果你对评估结果比较满意,就可以使用这个训练 / 预训练好的模型执行预测。

$ igel predict -dp 'path_to_your_test_dataset.csv'"""This will generate a predictions.csv file in your current directory, where all predictions are stored in a csv file"""

你可以使用一个「experiment」命令将训练、评估和预测结合到一起:
$ igel experiment -DP "path_to_train_data path_to_eval_data path_to_test_data" -yml "path_to_yaml_file"
"""This will run fit using train_data, evaluate using eval_data and further generate predictions using the test_data"""

当然,如果你想写代码也是可以的:
交互模式
交互模式是 v0.2.6 及以上版本中新添加的,该模式可以让你按照自己喜欢的方式写参数
也就是说,你可以使用 fit、evaluate、predict、experiment 等命令而无需指定任何额外的参数 ,比如:
igel fit
如果你只是编写这些内容并点击「enter」,系统将提示你提供额外的强制参数 。0.2.5 及以下版本会报错,所以你需要使用 0.2.6 及以上版本。

如 demo 所示,你不需要记住这些参数,igel 会提示你输入这些内容。具体而言,Igel 会提供一条信息,解释你需要输入哪个参数。 括号之间的值表示默认值。
端到端训练示例
项目作者给出了使用 igel 进行端到端训练的完整示例,即使用决策树算法预测某人是否患有糖尿病。你需要创建一个 yaml 配置文件,数据集可以在 examples 文件夹中找到。
拟合 / 训练模型:
model:    type: classification    algorithm: DecisionTree
target: - sick
$ igel fit -dp path_to_the_dataset -yml path_to_the_yaml_file
现在,igel 将拟合你的模型,并将其保存在当前目录下的 model_results 文件夹中。
评估模型:


请到「今天看啥」查看全文