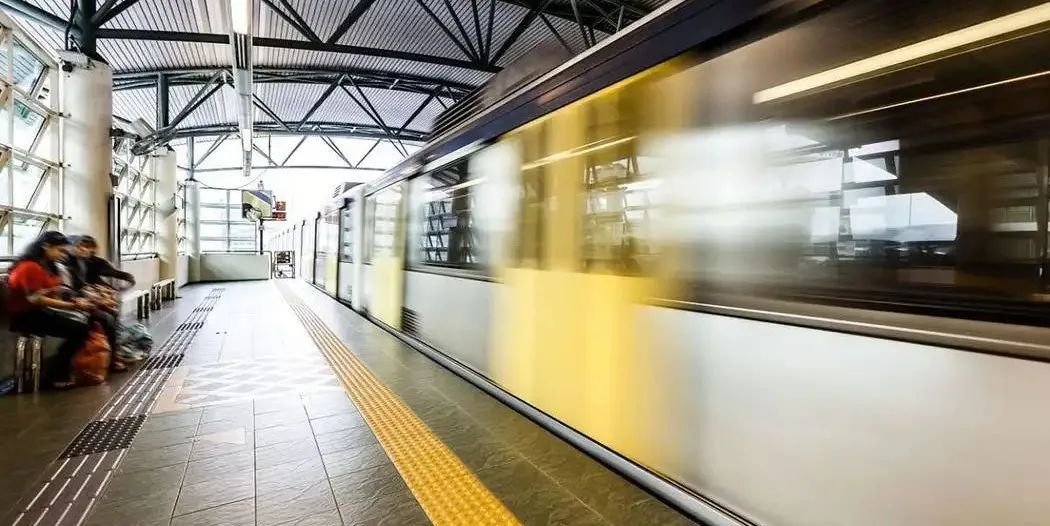
大家都知道,在地铁站等车时,广播里总是提醒我们:“别越过黄线哦!”但是,总有那么一些人,因为分心或者不注意,就站在了黄线边上,甚至跨了过去。这可是很危险的!今天,就让我带大家看看,怎么用人工智能来做个智能监控系统,一旦有人跨过黄线,系统就能立刻发出警告,保护大家的安全。
这篇文章,咱们分三步走:
📌
第一步
:聊聊怎么用YOLO11来检测和跟踪站台上的行人。
📌
第二步
:看看怎么用Hough变换和OpenCV技术找出站台边的黄线,并找到它的方程。
📌
第三步
:把上面两个技术结合起来,做个AI系统,专门盯着那些等车时越过黄线的人。系统会一帧一帧地检查,一旦发现有人越线,就会发出警告。在实际应用中,系统会在遵守黄线的人周围画个绿框,一旦有人越线,框就变红。如果真的用在车站,这个系统还能发出声音警报,提醒大家注意安全。
目标检测模型,就是帮我们找出图像或视频里的对象在哪儿,是啥。结果就是一堆框框,把检测到的对象框起来,还标上类别和置信度。这个技术特别适合用来找那些靠近轨道的人,不用知道他们具体长啥样。YOLO11有五个预训练模型,专门干这个的。下面的脚本,咱们就用最小的那个
yolo11n.pt
,来识别图像里的人,给他们画框。用
ultralytics
库的
plot()
函数,直接在图像上画框,特别方便。具体代码如下所示:
from ultralytics import YOLOimport argparseimport cv2
if __name__ == '__main__':''' Apply bbox to detected persons ''' parser = argparse.ArgumentParser() parser.add_argument('--image_path', type=str, default="resources/images/frame_yellow_line_0.png") opt = parser.parse_args() image_path = opt.image_path
model = YOLO("yolo11n.pt") image = cv2.imread(image_path) results = model.predict(image)
print("results[0].names: ", results[0].names)
for image_pred in results: class_names = image_pred.names boxes = image_pred.boxes
for box in boxes:if class_names[int(box.cls)] == "person": print("person") print("person bbox: ", box.xyxy) image_pred.plot() image_pred.show()
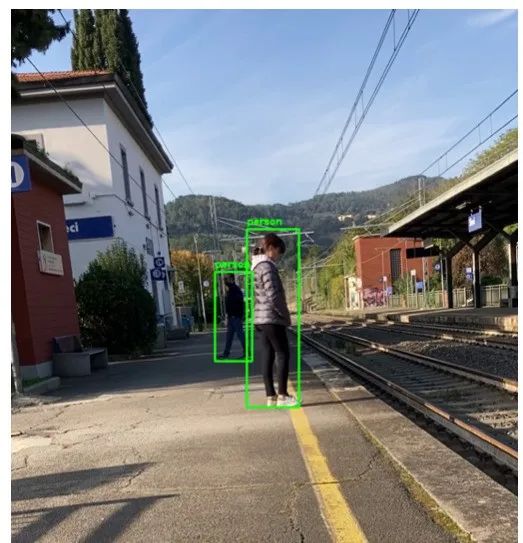
上面的程序输入图片后得到如下的结果:

YOLO11给检测到的人画的框。用ultralytics库的plot()函数画的。
用同样的模型,我还能提取每个人的框的坐标,用OpenCV画线。下面的脚本,效果和之前的差不多。画框的方法在后面的部分会用到。具体代码如下所示:
from ultralytics import YOLOimport cv2font = cv2.FONT_HERSHEY_DUPLEX
model = YOLO("yolo11n.pt")path_image = "resources/images/frame_yellow_line_900.png"image = cv2.imread(path_image)annotated_frame = image.copy()
results = model.predict(image, classes=[0], conf=0.54)image_pred = results[0]boxes = image_pred.boxes
for box in boxes:
x1 = int(box.xyxy[0][0]) y1 = int(box.xyxy[0][1]) x2 = int(box.xyxy[0][2]) y2 = int(box.xyxy[0][3]) coords = (x1, y1 - 10) text = "person"
print("x1: {} - y1: {} - x2: {} - y2: {}".format(x1, y1, x2, y2))
color = (0, 255, 0) thickness = 3 annotated_frame = cv2.rectangle(image, (x1, y1), (x2, y2), color, thickness) annotated_frame = cv2.putText(annotated_frame, text, coords, font, 0.7, color, 2)
annotated_frame_path = "/home/enrico/Projects/VideoSurveillance/resources/images/annotated_frame_900.png"cv2.imwrite(annotated_frame_path, annotated_frame)
用坐标和OpenCV画的YOLO11检测到的人的框。
姿态检测
姿态检测模型在某些情况下特别有用,比如我们需要知道人身体的某个部位在哪儿。YOLO11就有一套预训练模型,专门干这个的。这些模型会输出一系列关键点,代表图像里人的关键部位。每个人身上,YOLO11能找到17个关键点。下面的脚本,我展示了怎么在图像里提取这些关键点。YOLO11有五个预训练的姿态估计模型。这次,因为有些人可能离相机比较远,我用了更强的模型
yolo11m-pose.pt
。用这些关键点,我们还能画个框,把人框起来。这个框是通过取x和y坐标的最小值和最大值,连起来形成一个封闭人的矩形。具体代码如下所示:
from ultralytics import YOLOimport cv2font = cv2.FONT_HERSHEY_DUPLEXmodel = YOLO("yolo11m-pose.pt")path_image = "resources/images/frame_yellow_line_900.png"image = cv2.imread(path_image)cv2.imwrite(annotated_frame_bbox_path, annotated_frame_bbox)annotated_frame_keypoints = image.copy()annotated_frame_bbox = image.copy()results = model(image)
keypoints = results[0].keypointsconf = keypoints.confxy = keypoints.xyprint(xy.shape) print("Detected person: ", xy.shape[0])
for idx_person in range(xy.shape[0]):
print("idx_person: ", idx_person)
list_x = []list_y = []for i, th in enumerate(xy[idx_person]):x = int(th[0])y = int(th[1])
if x !=0.0 and y!=0.0:
list_x.append(x)list_y.append(y)print("x: {} - y: {}".format(x, y))annotated_frame_keypoints = cv2.circle(annotated_frame_keypoints, (x,y), radius=3, color=(0, 0, 255), thickness=-1)annotated_frame_keypoints = cv2.putText(annotated_frame_keypoints, str(i), (x, y-5), font, 0.7, (0, 0, 255), 2)
if len(list_x) > 0 and len(list_y) > 0:min_x = min(list_x)max_x = max(list_x)min_y = min(list_y)max_y = max(list_y)print("min_x: {} - max_x: {} - min_y: {} - max_y: {}".format(min_x, max_x, min_y, max_y))w = max_x - min_xh = max_y - min_ydx = int(w/3)x0 = min_x - dxx1 = max_x + dxy0 = min_y - dxy1 = max_y + dxprint("x0: {} - x1: {} - y0: {} - y1: {}".format(x0, x1, y0, y1))
coords = (x0, y0 - 10)text = "person"color = (0, 255, 0) thickness = 3annotated_frame_bbox = cv2.rectangle(annotated_frame_bbox, (x0, y0), (x1, y1), color, thickness)annotated_frame_bbox = cv2.putText(annotated_frame_bbox, text, coords, font, 0.7, color, 2)
annotated_frame_path = "/home/enrico/Projects/VideoSurveillance/resources/images/annotated_frame_keypoints_900.png"cv2.imwrite(annotated_frame_path, annotated_frame_keypoints)
annotated_frame_bbox_path = "/home/enrico/Projects/VideoSurveillance/resources/images/annotated_frame_keypoints_bbox_900.png"
下面图片显示了程序应用于同一图像的结果。每个人的关键点从 0 到 16。如果某些关键点未被检测到,系统不会产生错误,只会将其从输出图像中删除。在边界框方面,我们可以看到与物体检测模型相比存在微小差异,这主要是由于关键点位于人物内部。
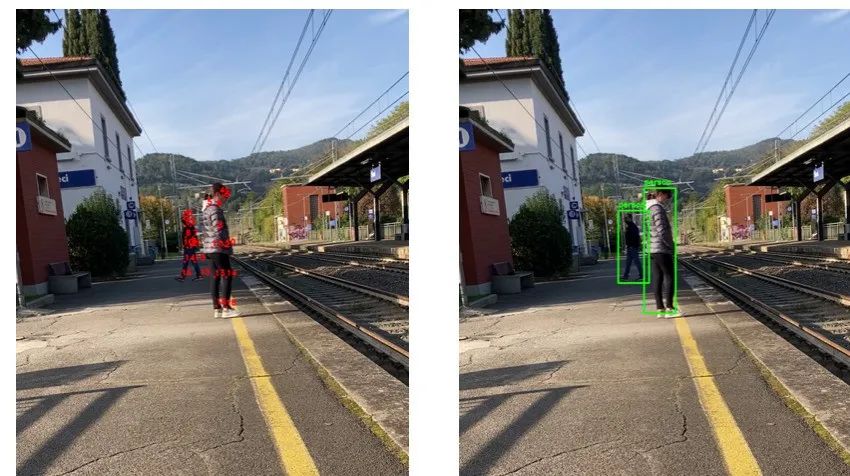
左边是每个人检测到的关键点。右边是根据关键点坐标确定的每个人的框。
Hough变换是个特征提取技术,能帮我们在图像里检测线条。这篇文章里,我们会学习怎么用Hough变换技术,在图像里检测线条和圆形。
为了找出站台边的黄线并确定它的线性方程,我们需要这么做:
首先,得把黄线从图像里分离出来。如果把图像从BGR颜色空间换成HSV颜色空间,这个任务会简单很多。转换用的代码如下,结果看【图4-step1】。
frame_hsv = cv2.cvtColor(image, cv2.COLOR_BGR2HSV)
第二步,得定义一个包含黄线颜色的黄色范围。我测试了几次,找到了合适的值。用这个范围,我能分离出落在指定黄色谱系内的像素,得到一个黄线的掩码,看【图4-setp2】。
yellow_light = np.array([20, 140, 200], np.uint8)yellow_dark = np.array([35, 255, 255], np.uint8)
mask_yellow = cv2.inRange(frame_hsv, yellow_light, yellow_dark)kernel = np.ones((4, 4), "uint8")
mask_yellow = cv2.morphologyEx(mask_yellow, cv2.MORPH_CLOSE, kernel)mask_yellow = cv2.morphologyEx(mask_yellow, cv2.MORPH_OPEN, kernel)
第三步,用Canny边缘检测算法处理第二步得到的掩码。这样就能得出带有边缘的图像。
看【图4-setp3】。
edges_yellow = cv2.Canny(mask_yellow, 50, 150)
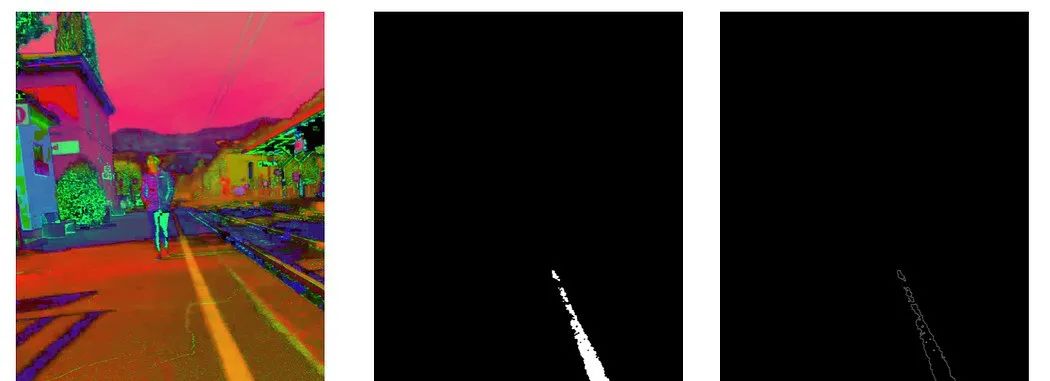
步骤1是HSV颜色空间的图像。步骤2是检测到的黄线掩码。步骤3是用Canny算法得到的边缘。
接下来准备好用
Probabilistic Hough Transform
函数来提取图像中所有可能的线条段。这个函数的语法是这样的:
lines = cv2.HoughLinesP(image, rho, theta, threshold, minLineLength=None, maxLineGap=None)
参数包括:
-
image
:输入的二值灰度图像。在我们的例子里,就是Canny算法提取的边缘图像。
-
rho
:累加器在距离维度上的分辨率(像素)。这决定了线到原点的距离的精度。值越小,精度越高。
-
theta
:累加器在角度维度上的分辨率(弧度)。它定义了线角度的量化精度。
-
threshold
:认为一条线有效所需的最小投票数(Hough累加器中的交点)。值越高,检测越严格。
-
minLineLength
:线段的最小长度。比这短的线段会被丢弃。
-
maxLineGap
:将两个线段连接成一条线的像素最大间隙。这决定了如何处理同一条线上不连续的部分。
我在下面的脚本中应用了HoughLinesP函数和斜率与y截距的公式。调整不同的阈值、minLineLength和maxLineGap值,我找到了能得出黄线单一直线的值。
import cv2import numpy as np

def find_slope(x1, y1, x2, y2):if x2 != x1:return ((y2 - y1) / (x2 - x1))else:return np.inf

def find_m_and_q(edges):
    lines = cv2.HoughLinesP(


