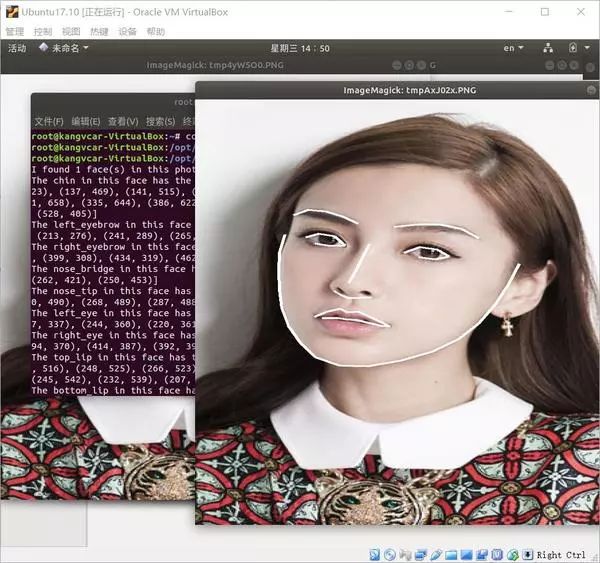
专栏名称: 软件定义世界(SDX)
软件定义世界, 数据驱动未来。
目录
相关文章推荐
CDA数据分析师  ·  【干货】7天入门SQL?不用?一天就够,真不难! ·  昨天  
CDA数据分析师  ·  【案例】小米、中国电信的用户画像分析案例 ·  2 天前  
天池大数据科研平台  ·  谷歌重磅推出全新Scaling ... ·  昨天  
数据派THU  ·  【博士论文】利用图结构加速稀疏计算 ·  2 天前  
大数据文摘  ·  Science:AI大模型只是当代“印刷术” ... ·  昨天  
51好读  ›  专栏  ›  软件定义世界(SDX)

手把手教你用1行代码实现人脸识别 -- Python Face_recognition

软件定义世界(SDX)  · 公众号  · 大数据  · 2017-11-02 06:30

正文

热门下载 (点击标题即可阅读)

☞【下载】2015中国数据分析师行业峰会精彩PPT下载(共计21个文件)

作者:Kangvcar

简书专栏:http://www.jianshu.com/u/d9c480744afd

环境要求:

  • Ubuntu17.10

  • Python 2.7.14


环境搭建:


1. 安装 Ubuntu17.10  > 安装步骤在这里

http://www.jianshu.com/p/778e92eb0461

2. 安装 Python2.7.14 (Ubuntu17.10 默认Python版本为2.7.14)


3. 安装 git 、cmake 、 python-pip
# 安装 git
$ sudo apt-get install -y git
# 安装 cmake
$ sudo apt-get install -y cmake
# 安装 python-pip
$ sudo apt-get install -y python-pip
4. 安装编译dlib

安装face_recognition这个之前需要先安装编译dlib

# 编译dlib前先安装 boost
$ sudo apt-get install libboost-all-dev

# 开始编译dlib
# 克隆dlib源代码
$ git clone https://github.com/davisking/dlib.git
$ cd dlib
$ mkdir build
$ cd build
$ cmake .. -DDLIB_USE_CUDA=0 -DUSE_AVX_INSTRUCTIONS=1
$ cmake --build .(注意中间有个空格)
$ cd ..
$ python setup.py install --yes USE_AVX_INSTRUCTIONS --no DLIB_USE_CUDA


5. 安装 face_recognition


# 安装 face_recognition
$ pip install face_recognition
# 安装face_recognition过程中会自动安装 numpy、scipy 等


环境搭建完成后,在终端输入 face_recognition 命令查看是否成功


实现人脸识别:


示例一(1行代码实现人脸识别):


1. 首先你需要提供一个文件夹,里面是所有你希望系统认识的人的图片。其中每个人一张图片,图片以人的名字命名:


known_people文件夹下有babe、成龙、容祖儿的照片


2. 接下来,你需要 准备另一个文件夹,里面是你要识别的图片:


unknown_pic文件夹下是要识别的图片,其中韩红是机器不认识的


3. 然后你就可以运行face_recognition命令了,把刚刚准备的两个文件夹作为参数传入,命令就会返回需要识别的图片中都出现了谁:


识别成功!!!


示例二(识别图片中的所有人脸并显示出来):


# filename : find_faces_in_picture.py
# -*- coding: utf-8 -*-
# 导入pil模块 ,可用命令安装 apt-get install python-Imaging
from PIL import Image
# 导入face_recogntion模块,可用命令安装 pip install face_recognition
import face_recognition

# 将jpg文件加载到numpy 数组中
image = face_recognition.load_image_file("/opt/face/unknown_pic/all_star.jpg")

# 使用默认的给予HOG模型查找图像中所有人脸
# 这个方法已经相当准确了,但还是不如CNN模型那么准确,因为没有使用GPU加速
# 另请参见: find_faces_in_picture_cnn.py
face_locations = face_recognition.face_locations(image)

# 使用CNN模型
# face_locations = face_recognition.face_locations(image, number_of_times_to_upsample=0, model="cnn")

# 打印:我从图片中找到了 多少 张人脸
print("I found {} face(s) in this photograph.".format(len(face_locations)))

# 循环找到的所有人脸
for face_location in face_locations:

        # 打印每张脸的位置信息
        top, right, bottom, left = face_location
        print("A face is located at pixel location Top: {}, Left: {}, Bottom: {}, Right: {}".format(top, left, bottom, right))

        # 指定人脸的位置信息,然后显示人脸图片
        face_image = image[top:bottom, left:right]
        pil_image = Image.fromarray(face_image)
        pil_image.show()


用于识别的图片

# 执行python文件
$ python find_faces_in_picture.py


从图片中识别出7张人脸,并显示出来


示例三(自动识别人脸特征):

# filename : find_facial_features_in_picture.py
# -*- coding: utf-8 -*-
# 导入pil模块 ,可用命令安装 apt-get install python-Imaging
from PIL import Image, ImageDraw
# 导入face_recogntion模块,可用命令安装 pip install face_recognition
import face_recognition

# 将jpg文件加载到numpy 数组中
image = face_recognition.load_image_file("biden.jpg")

#查找图像中所有面部的所有面部特征
face_landmarks_list = face_recognition.face_landmarks(image)

print("I found {} face(s) in this photograph.".format(len(face_landmarks_list)))

for face_landmarks in face_landmarks_list:

   #打印此图像中每个面部特征的位置
    facial_features = [
        'chin',
        'left_eyebrow',
        'right_eyebrow',
        'nose_bridge',
        'nose_tip',
        'left_eye',
        'right_eye',
        'top_lip',
        'bottom_lip'
    ]

    for facial_feature in facial_features:
        print("The {} in this face has the following points: {}".format(facial_feature, face_landmarks[facial_feature]))

   #让我们在图像中描绘出每个人脸特征!
    pil_image = Image.fromarray(image)
    d = ImageDraw.Draw(pil_image)

    for facial_feature in facial_features:
        d.line(face_landmarks[facial_feature], width=5)

    pil_image.show()


自动识别出人脸特征


示例四(识别人脸鉴定是哪个人):

# filename : recognize_faces_in_pictures.py
# -*- conding: utf-8 -*-
# 导入face_recogntion模块,可用命令安装 pip install face_recognition
import face_recognition

#将jpg文件加载到numpy数组中
babe_image = face_recognition.load_image_file("/opt/face/known_people/babe.jpeg")
Rong_zhu_er_image = face_recognition.load_image_file("/opt/face/known_people/Rong zhu er.jpg")
unknown_image = face_recognition.load_image_file("/opt/face/unknown_pic/babe2.jpg")

#获取每个图像文件中每个面部的面部编码
#由于每个图像中可能有多个面,所以返回一个编码列表。
#但是由于我知道每个图像只有一个脸,我只关心每个图像中的第一个编码,所以我取索引0。
babe_face_encoding = face_recognition.face_encodings(babe_image)[0]
Rong_zhu_er_face_encoding = face_recognition.face_encodings(Rong_zhu_er_image)[0]
unknown_face_encoding = face_recognition.face_encodings(unknown_image)[0]

known_faces = [
    babe_face_encoding,
    Rong_zhu_er_face_encoding
]

#结果是True/false的数组,未知面孔known_faces阵列中的任何人相匹配的结果
results = face_recognition.compare_faces(known_faces, unknown_face_encoding)

print("这个未知面孔是 Babe 吗? {}".format(results[0]))
print("这个未知面孔是 容祖儿 吗? {}".format(results[1]))
print("这个未知面孔是 我们从未见过的新面孔吗? {}".format(not True in results))


显示结果如图


示例五(识别人脸特征并美颜):

# filename : digital_makeup.py
# -*- coding: utf-8 -*-
# 导入pil模块 ,可用命令安装 apt-get install python-Imaging
from PIL import Image, ImageDraw
# 导入face_recogntion模块,可用命令安装 pip install face_recognition
import face_recognition

#将jpg文件加载到numpy数组中
image = face_recognition.load_image_file("biden.jpg")

#查找图像中所有面部的所有面部特征
face_landmarks_list = face_recognition.face_landmarks(image)

for face_landmarks in face_landmarks_list:
    pil_image = Image.fromarray(image)
    d = ImageDraw.Draw(pil_image, 'RGBA')

    #让眉毛变成了一场噩梦
    d.polygon(face_landmarks['left_eyebrow'], fill=(68, 54, 39, 128))
    d.polygon(face_landmarks['right_eyebrow'], fill=(68, 54, 39, 128))
    d.line(face_landmarks['left_eyebrow'], fill=(68, 54, 39, 150), width=5)
    d.line(face_landmarks['right_eyebrow'], fill=(68, 54, 39, 150), width=5)

    #光泽的嘴唇
    d.polygon(face_landmarks['top_lip'], fill=(150, 0, 0, 128))
    d.polygon(face_landmarks['bottom_lip'], fill=(150, 0, 0, 128))
    d.line(face_landmarks['top_lip'], fill=(150, 0, 0, 64), width=8)
    d.line(face_landmarks['bottom_lip'], fill=(150, 0, 0, 64), width=8)

    #闪耀眼睛
    d.polygon(face_landmarks['left_eye'], fill=(255, 255, 255, 30))
    d.polygon(face_landmarks['right_eye'], fill=(255, 255, 255, 30))

    #涂一些眼线
    d.line(face_landmarks['left_eye'] + [face_landmarks['left_eye'][0]], fill=(0, 0, 0, 110), width=6)
    d.line(face_landmarks['right_eye'] + [face_landmarks['right_eye'][0]], fill=(0, 0, 0, 110), width=6)

    pil_image.show()

美颜前后对比


读BD最佳实践案例,赢DT未来!


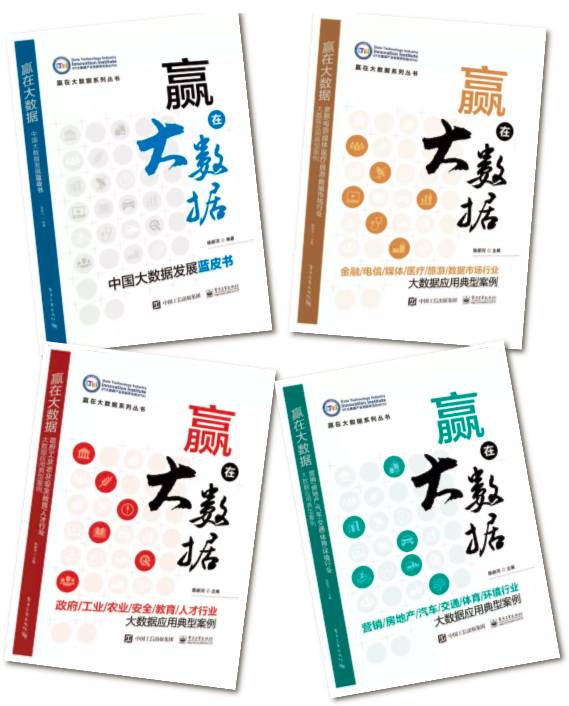
18各行业,106个中国大数据应用最佳实践案例:

(1)《赢在大数据:中国大数据发展蓝皮书》;

(2)《赢在大数据:金融/电信/媒体/医疗/旅游/数据市场行业大数据应用典型案例》;

(3)《赢在大数据:营销/房地产/汽车/交通/体育/环境行业大数据应用典型案例》;

(4)《赢在大数据:政府/工业/农业/安全/教育/人才行业大数据应用典型案例》。

京东网购买链接:

https://item.jd.com/12160064.html

当当网购买链接:

http://product.dangdang.com/25088394.html

扫描下方二维码,可直接进入京东 购书:


或点击 “阅读原文” ,购买“赢在大数据系列丛书”。


推荐文章


点击 蓝色标题 即可阅读全文

10万读者睿选 2016年TOP100 2015年TOP100


请到「今天看啥」查看全文