作者:日光镇
原文
本文是《个人页的自我修养》系列文章的一篇,全部:
-
导航栏的平滑显示和隐藏 - 个人页的自我修养(1) (本篇)
-
多个UITableView共用一个tableHeader的效果实现 - 个人页的自我修养(2)(待补坑)
-
处理Pan手势和ScrollView滚动冲突 - 个人页的自我修养(3)(待补坑)
带有社交属性的APP一般都会有一个“个人页”,用以展示某个用户的个人信息和发布的内容。以下是几个例子:

以上页面的共同特征是:
-
透明的导航栏以更好的展示背景图
-
可按标签切换到不同的内容页(这个特性看需求,不一定有)
-
滚动时会停靠在页面顶部的SegmentView
-
各个可滚动的内容页共用一个header
最近刚好写到Rabo微博客户端的个人页的部分,发现踩到几个有意思的坑,解决下来决定写个系列文章把相关解决方法和代码分享一下。
先看一下要实现的整体效果:

这篇文章先处理导航栏的平滑隐藏和显示。
1、现有解决方案
先看一下手机QQ,是我目前能找到的处理得算比较好的导航栏返回效果。导航栏有跟随返回手势透明度渐变的动画。
QQ返回.gif
但导航栏的返回交互动画是自定义的,没有系统自带的视差效果和毛玻璃效果,而且中断返回操作的话导航栏会闪一下,影响观感。

QQ取消返回.gif
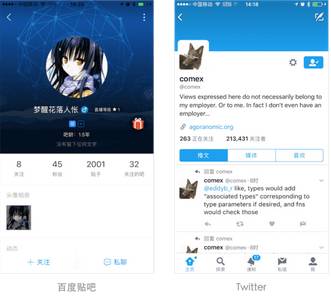
再看一下其他3家的处理方式,他们的处理方法基本一致,都是在进入个人页时隐藏了系统导航栏,然后添加一个自定义的导航栏,所以过度会比较生硬,与整体的返回效果有断层。

微博.gif

百度贴吧.gif
Twitter.gif
好,看完以上的例子,轮到我们来实现啦。我们今天的目标是不自定义导航栏,在系统自带导航栏的基础上进行非侵入(代码解耦)的实现。先看效果:
navDemo.gif
你可以
在这里下载本篇文章的代码
2、记录某个VC的导航栏透明度
对于同一个NavigationController上的ViewController,NavigationBar是全局的,并不能单独设置某个ViewController的导航栏样式和属性。所以我们先给ViewController用扩展添加一个记录导航栏透明度的属性:
//ET_NavBarTransparent.swift
extension UIViewController {
fileprivate struct AssociatedKeys {
static var navBarBgAlpha: CGFloat = 1.0
}
var navBarBgAlpha: CGFloat {
get {
let alpha = objc_getAssociatedObject(self, &AssociatedKeys.navBarBgAlpha) as? CGFloat
if alpha == nil {
//默认透明度为1
return 1.0
}else{
return alpha!
}
}
set {
var alpha = newValue
if alpha > 1 {
alpha = 1
}
if alpha
alpha = 0
}
objc_setAssociatedObject(self, &AssociatedKeys.navBarBgAlpha, alpha, .OBJC_ASSOCIATION_RETAIN_NONATOMIC)
//设置导航栏透明度
navigationController?.setNeedsNavigationBackground(alpha: alpha)
}
}
}
好的,现在可以根据需要随时记录下某个VC的导航栏透明度了,而不会因为push到下个页面而丢失了这个信息。
3、设置导航栏背景的透明度
要实现上面demo的效果,我们不能修改整个导航栏的透明度,因为导航栏上的NavigationBarItem是需要保留下来的,如果设置整个导航栏的透明度,左右的Item和标题栏都会跟着一起透明了。
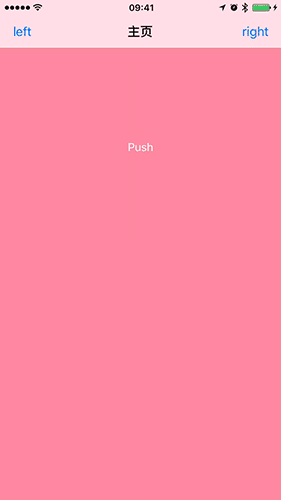
navItem.png
然而,系统API并没有访问背景View的接口,只好动用下黑魔法了。先看一下导航栏的层级:
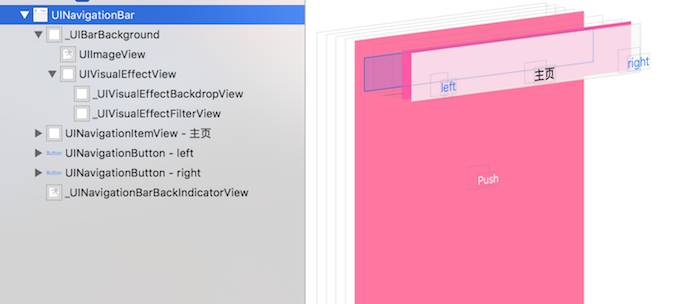
navlevel.png
首先想到调整第一层_barBackgroundView(_UIBarBackground)的透明度,但试了一下,调整这一层级会丢失毛玻璃效果,效果很突兀:
经过测试,调整_backgroundEffectView(-UIVisualEffectView)不会丢失毛
璃效果:

下面是调整导航栏背景透明度的相关代码:
//ET_NavBarTransparent.swift
extension UINavigationController {
//Some other code
fileprivate func setNeedsNavigationBackground(alpha:CGFloat) {
let barBackgroundView = navigationBar.value(forKey: "_barBackgroundView") as AnyObject
let backgroundImageView = barBackgroundView.value(forKey: "_backgroundImageView") as? UIImageView
if navigationBar.isTranslucent {
if backgroundImageView != nil && backgroundImageView!.image != nil {
(barBackgroundView as! UIView).alpha = alpha
}else{
if let backgroundEffectView = barBackgroundView.value(forKey: "_backgroundEffectView") as? UIView {
backgroundEffectView.alpha = alpha
}
}
}else{
(barBackgroundView as! UIView).alpha = alpha
}
if let shadowView = barBackgroundView.value(forKey: "_shadowView") as? UIView {
shadowView.alpha = alpha
}
}
}
到这里,我们只要给viewController的扩展属性navBarBgAlpha赋值,就可以随意设置导航栏的透明度了。
4、监控返回手势的进度
在手势返回的交互中,如果前后两个VC的导航栏透明度不一样,需要根据手势的进度实时调节透明度。
这里method swizzling一下,用UINavigationController的"_updateInteractiveTransition:"方法监控返回交互动画的进度。
//ET_NavBarTransparent.swift
extension UINavigationController {
//Some other code
open override class func initialize(){
if self == UINavigationController.self {
let originalSelectorArr = ["_updateInteractiveTransition:"]
//method swizzling
for ori in originalSelectorArr {
let originalSelector = NSSelectorFromString(ori)
let swizzledSelector = NSSelectorFromString("et_\(ori)")
let originalMethod = class_getInstanceMethod(self.classForCoder(), originalSelector)
let swizzledMethod = class_getInstanceMethod(self.classForCoder(), swizzledSelector)
method_exchangeImplementations(originalMethod, swizzledMethod)
}
}
}
func et__updateInteractiveTransition(_ percentComplete: CGFloat) {
et__updateInteractiveTransition(percentComplete)
let topVC = self.topViewController
if topVC != nil {
//transitionCoordinator带有两个VC的转场上下文
let coor = topVC?.transitionCoordinator
if coor != nil {
//fromVC 的导航栏透明度
let fromAlpha = coor?.viewController(forKey: .from)?.navBarBgAlpha
//toVC 的导航栏透明度
let toAlpha = coor?.viewController(forKey: .to)?.navBarBgAlpha
//计算当前的导航栏透明度
let nowAlpha = fromAlpha! + (toAlpha!-fromAlpha!)*percentComplete
//设置导航栏透明度
self.setNeedsNavigationBackground(alpha: nowAlpha)
}
}
}
}
看一下到这一步的效果:
在手势交互的过程中,透明度的变化跟预期一样跟随手势变化。但一旦松手,系统会自动完成或取消返回操作,在这一过程中,以上的方法并没有调用,而导致透明度停留在最后的那个状态。
我们需要在UINavigationControllerDelegate中添加边缘返回手势松手时的监控,还有要处理一下直接点击返回按钮和正常Push到新界面时的情况:
//ET_NavBarTransparent.swift
extension UINavigationController:UINavigationControllerDelegate,UINavigationBarDelegate {
public func navigationController(_ navigationController: UINavigationController, willShow viewController: UIViewController, animated: Bool) {
let topVC = navigationController.topViewController
if topVC != nil {
let coor = topVC?.transitionCoordinator
if coor != nil {
//添加对返回交互的监控
if #available(iOS 10.0, *) {
coor?.notifyWhenInteractionChanges({ (context) in
self.dealInteractionChanges(context)
})
} else {
coor?.notifyWhenInteractionEnds({ (context) in
self.dealInteractionChanges(context)
})
}
}
}
}
//处理返回手势中断对情况
private func dealInteractionChanges(_ context:UIViewControllerTransitionCoordinatorContext) {
if context.isCancelled {
//自动取消了返回手势
let cancellDuration:TimeInterval = context.transitionDuration * Double( context.percentComplete)
UIView.animate(withDuration: cancellDuration, animations: {
let nowAlpha = (context.viewController(forKey: .from)?.navBarBgAlpha)!
self.setNeedsNavigationBackground(alpha: nowAlpha)
self.navigationBar.tintColor = context.viewController(forKey: .from)?.navBarTintColor
})
}else{
//自动完成了返回手势
let finishDuration:TimeInterval = context.transitionDuration * Double(1 - context.percentComplete)
UIView.animate(withDuration: finishDuration, animations: {
let nowAlpha = (context.viewController(forKey: .to)?.navBarBgAlpha)!
self.setNeedsNavigationBackground(alpha: nowAlpha)
self.navigationBar.tintColor = context.viewController(forKey: .to)?.navBarTintColor
})
}
}
public func navigationBar(_ navigationBar: UINavigationBar, shouldPop item: UINavigationItem) -> Bool {
if viewControllers.count >= (navigationBar.items?.count)! {
//点击返回按钮
let popToVC = viewControllers[viewControllers.count-2]
setNeedsNavigationBackground(alpha: (popToVC.navBarBgAlpha))
navigationBar.tintColor = popToVC.navBarTintColor
_ = self.popViewController(animated: true)
}
return true
}
public func navigationBar(_ navigationBar: UINavigationBar, shouldPush item: UINavigationItem) -> Bool {
//push到一个新界面
setNeedsNavigationBackground(alpha: (topViewController?.navBarBgAlpha)!)
navigationBar.tintColor = topViewController?.navBarTintColor
return true
}
}
好的,到这里,对返回和push操作的处理已经完成。
5、使用
只需要在隐藏导航栏背景的viewController上把navBarBgAlpha设为0(或其他你需要的值)就可以了:
override func viewDidLoad() {
super.viewDidLoad()
self.navBarBgAlpha = 0
//other code
}
然后在比如tableView滚动到某个位置,需要显示导航栏时,把navBarBgAlpha设为1(或其他你需要的值)。
6、其他
要达到平滑的转场效果,还需要对navigationBar的tintColor进行类似的操作,这部分就留给大家自己看一下源码的相关部分啦。
还有一些细节,比如状态栏颜色变化的时机,“preferredStatusBarStyle:”的调用链等,也交给大家去发现和思考了。