新媒体管家
点击上方“程序员共读”,选择“置顶公众号”
关键时刻,第一时间送达!


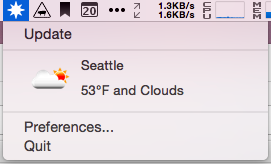
下面开始介绍如何使用Swift开发一个Mac Menu Bar(Status Bar) App。通过做一个简单的天气App。天气数据来源于OpenWeatherMap。
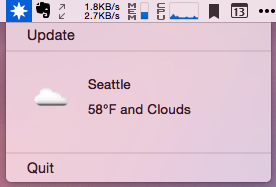
完成后的效果如下:
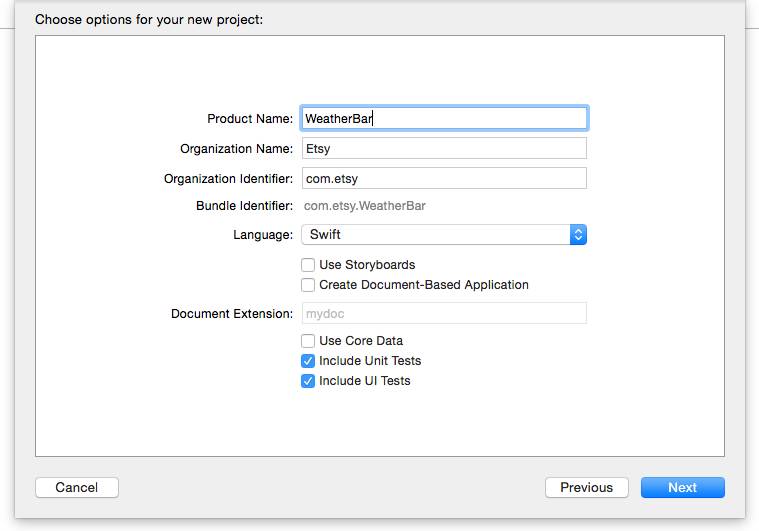
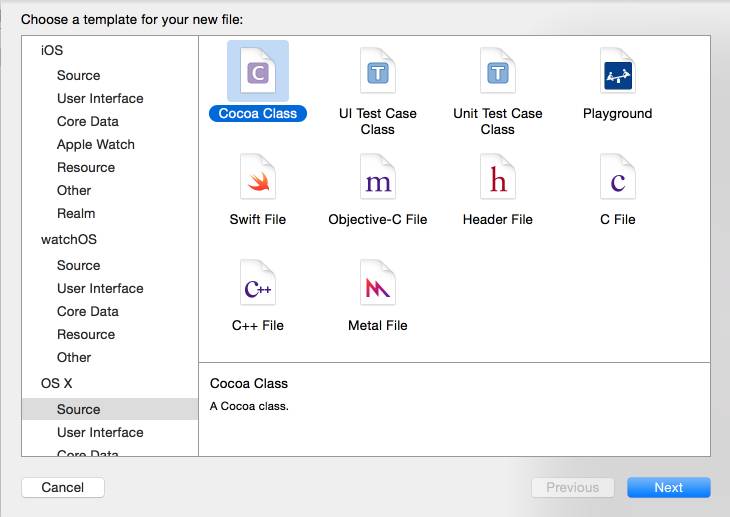
打开Xcode,Create a New Project or File - New - Project - Application - Cocoa Application ( OS X 这一栏)。点击下一步。
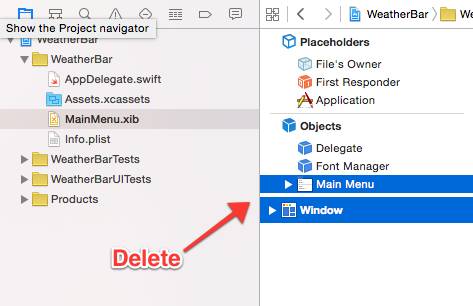
1.打开MainMenu.xib,删除默认的windows和menu菜单。因为我们是状态栏app,不需要菜单栏,不需要主窗口。
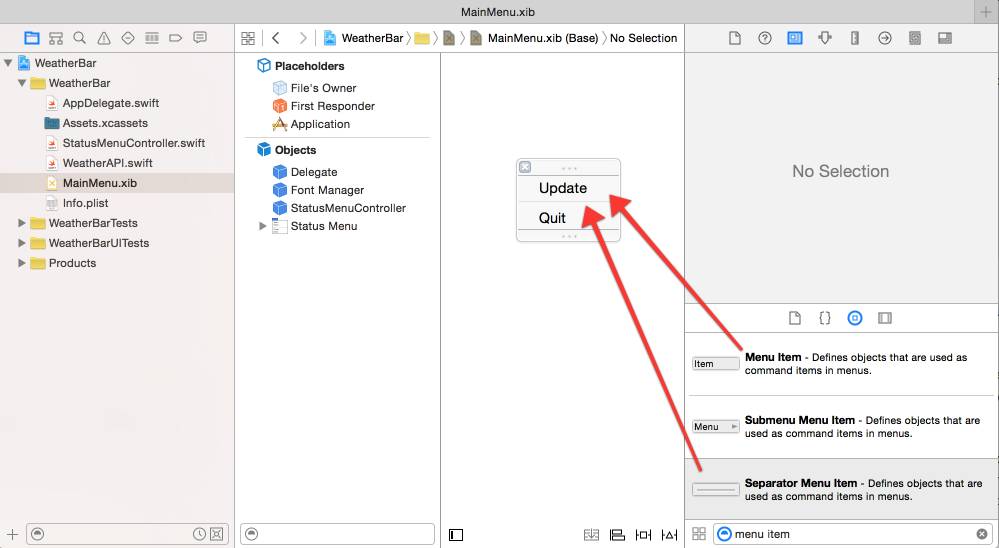
2.添加一个Menu菜单
删除其中默认的2个子菜单选项,仅保留1个。并将保留的这个改名为“Quit”。
3.打开双视图绑定Outlet
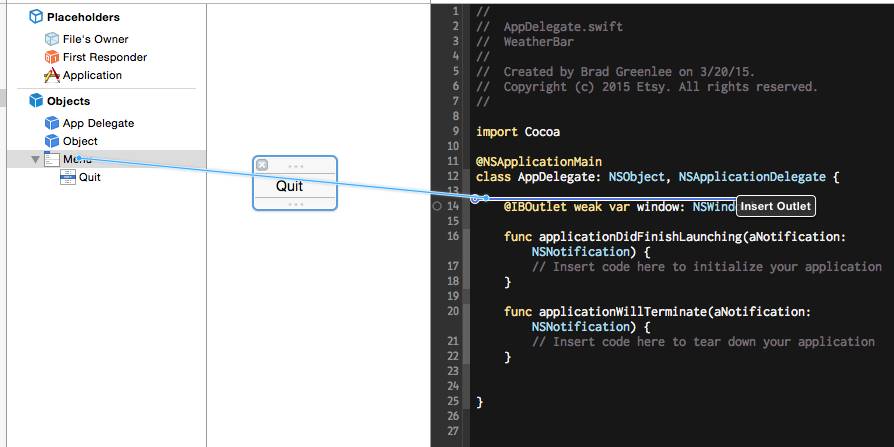
4.代码
let statusItem = NSStatusBar.systemStatusBar().statusItemWithLength(NSVariableStatusItemLength)
statusItem.title = "WeatherBar"
statusItem.menu = statusMenu
NSApplication.sharedApplication().terminate(self)

运行,你可以看到一个状态栏了。
你应该注意到了,当你运行后,底部Dock栏里出现了一个App启动的Icon。但实际上我们也不需要这个启动icon,打开Info,添加 “Application is agent (UIElement)”为YES。
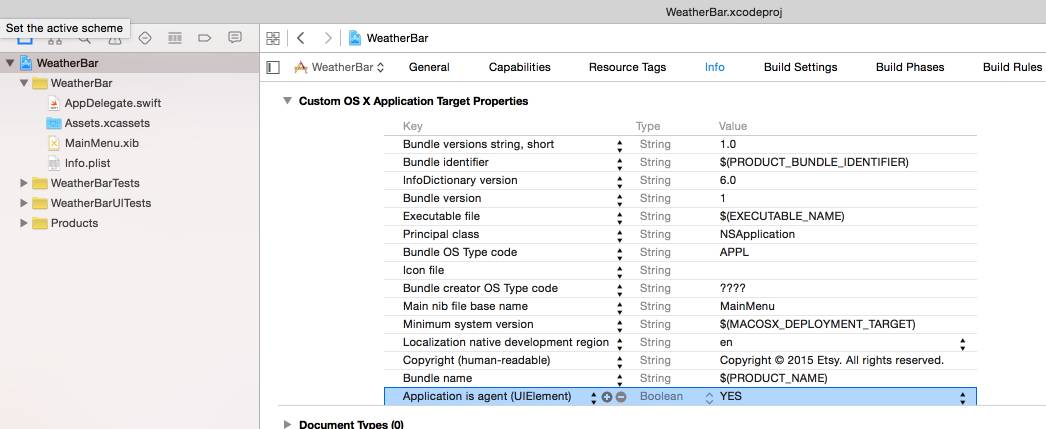
运行一下,不会出现dock启动icon了。
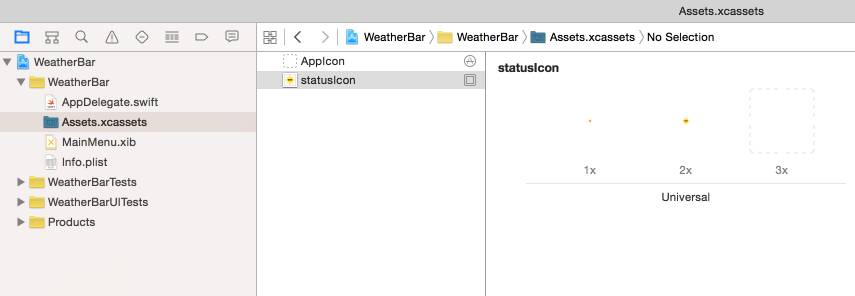
状态栏icon尺寸请使用18x18, 36x36(@2x), 54x54(@3x),添加这1x和2x两张图到Assets.xcassets中。
在applicationDidFinishLaunching中,修改为如下:
let icon = NSImage(named: "statusIcon")
icon?.template = true // best for dark mode
statusItem.image = icon
statusItem.menu = statusMenu
运行一下,你应该看到状态栏icon了。
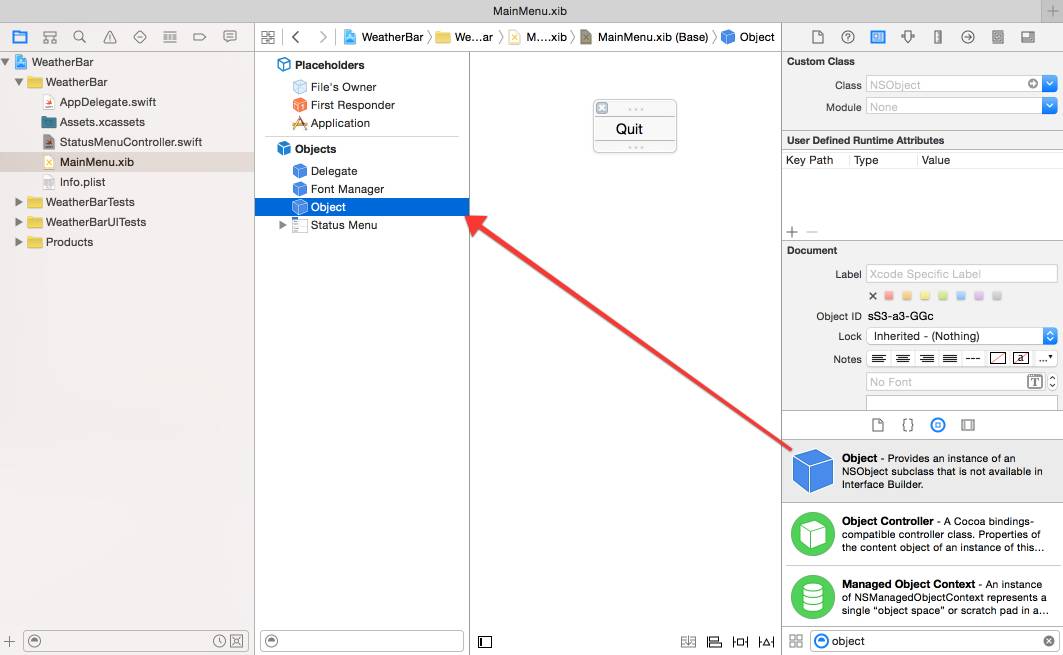
如果我们进一步写下去,你会发现大量代码在AppDelegate中,我们不希望这样。下面我们为Menu创建一个Controller来管理。
代码如下:
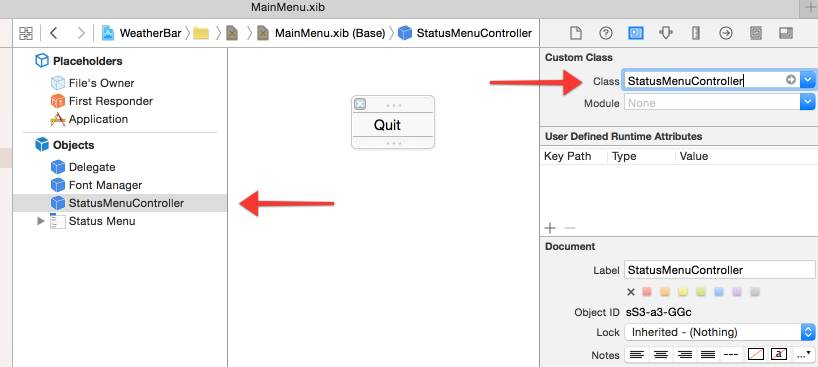
// StatusMenuController.swift
import Cocoa
class StatusMenuController: NSObject {
@IBOutlet weak var statusMenu: NSMenu!
let statusItem = NSStatusBar.systemStatusBar().statusItemWithLength(NSVariableStatusItemLength)
override func awakeFromNib() {
let icon = NSImage(named: "statusIcon")
icon?.template = true // best for dark mode
statusItem.image = icon
statusItem.menu = statusMenu
}
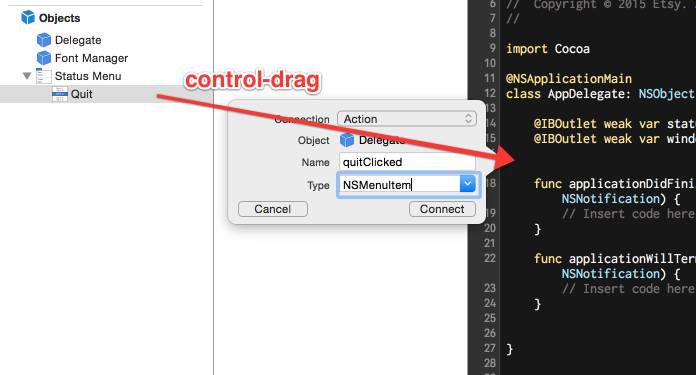
@IBAction func quitClicked(sender: NSMenuItem) {
NSApplication.sharedApplication().terminate(self)
}
}
// AppDelegate.swift
import Cocoa
@NSApplicationMain
class AppDelegate: NSObject, NSApplicationDelegate {
func applicationDidFinishLaunching(aNotification: NSNotification) {
// Insert code here to initialize your application
}
func applicationWillTerminate(aNotification: NSNotification) {
// Insert code here to tear down your application
}
}
注意,因为删除了AppDelegate中的Outlet注册,所以你需要重新连Outlet,但在这之前我们需要先做一件事。(你可以试试连接StatusMenuController中的Outlet,看看会怎么样?)
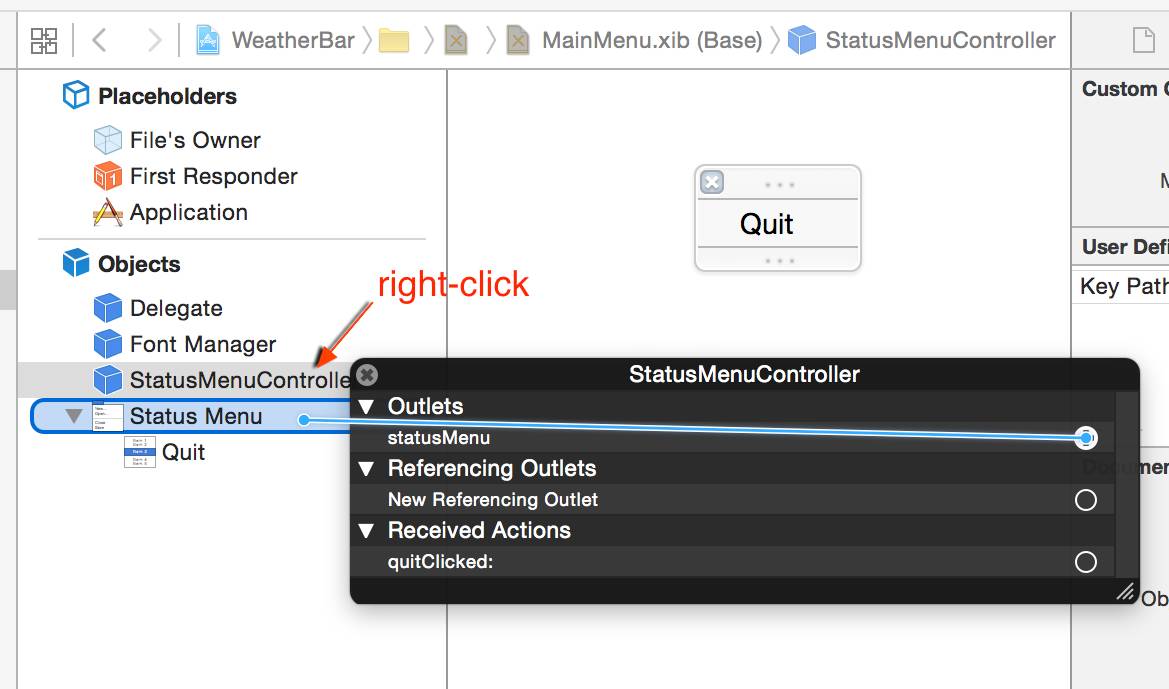
当MainMenu.xib被初始化的时候,StatusMenuController下的awakeFromNib将会被执行,所以我们在里面做初始化工作。
运行一下,保证你全部正常工作了。
我们使用 OpenWeatherMap的天气数据,所以你得注册一个账号,获取到免费的API Key。
import Foundation
class WeatherAPI {
let API_KEY = "your-api-key-here"
let BASE_URL = "http://api.openweathermap.org/data/2.5/weather"
func fetchWeather(query: String) {
let session = NSURLSession.sharedSession()
// url-escape the query string we're passed
let escapedQuery = query.stringByAddingPercentEncodingWithAllowedCharacters(NSCharacterSet.URLQueryAllowedCharacterSet())
let url = NSURL(string: "(BASE_URL)?APPID=(API_KEY)&units=imperial&q=(escapedQuery!)")
let task = session.dataTaskWithURL(url!) { data, response, err in
// first check for a hard error
if let error = err {
NSLog("weather api error: (error)")
}
// then check the response code
if let httpResponse = response as? NSHTTPURLResponse {
switch httpResponse.statusCode {
case 200: // all good!
let dataString = NSString(data: data!, encoding: NSUTF8StringEncoding) as! String
NSLog(dataString)
case 401: // unauthorized
NSLog("weather api returned an 'unauthorized' response. Did you set your API key?")
default:
NSLog("weather api returned response: %d %@", httpResponse.statusCode, NSHTTPURLResponse.localizedStringForStatusCode(httpResponse.statusCode))
}
}
}
task.resume()
}
}
绑定Action到StatusMenuController.swift,取名为updateClicked
let weatherAPI = WeatherAPI(),
weatherAPI.fetchWeather("Seattle")
注意OSX 10.11之后请添加NSAppTransportSecurity,保证http能使用。
运行一下,然后点击Update菜单。你会收到一个json格式的天气数据。
import Cocoa
class StatusMenuController: NSObject {
@IBOutlet weak var statusMenu: NSMenu!
let statusItem = NSStatusBar.systemStatusBar().statusItemWithLength(NSVariableStatusItemLength)
let weatherAPI = WeatherAPI()
override func awakeFromNib() {
statusItem.menu = statusMenu
let icon = NSImage(named: "statusIcon")
icon?.template = true // best for dark mode
statusItem.image = icon
statusItem.menu = statusMenu
updateWeather()
}
func updateWeather() {
weatherAPI.fetchWeather("Seattle")
}
@IBAction func updateClicked(sender: NSMenuItem) {
updateWeather()
}
@IBAction func quitClicked(sender: NSMenuItem) {
NSApplication.sharedApplication().terminate(self)
}
}
你可以使用 SwiftyJSON,但本次我们先不使用第三方库。我们得到的天气数据如下:
{
"coord": {
"lon": -122.33,
"lat": 47.61
},
"weather": [{
"id": 800,
"main": "Clear",
"description": "sky is clear",
"icon": "01n"
}],
"base": "cmc stations",
"main": {
"temp": 57.45,
"pressure": 1018,
"humidity": 59,
"temp_min": 53.6,
"temp_max": 62.6
},
"wind": {
"speed": 2.61,
"deg": 19.5018
},
"clouds": {
"all": 1
},
"dt": 1444623405,
"sys": {
"type": 1,
"id": 2949,
"message": 0.0065,
"country": "US",
"sunrise": 1444659833,
"sunset": 1444699609
},
"id": 5809844,
"name": "Seattle",
"cod": 200
}
struct Weather {
var city: String
var currentTemp: Float
var conditions: String
}
func weatherFromJSONData(data: NSData) -> Weather? {
typealias JSONDict = [String:AnyObject]
let json : JSONDict
do {
json = try NSJSONSerialization.JSONObjectWithData(data, options: []) as! JSONDict
} catch {
NSLog("JSON parsing failed: (error)")
return nil
}
var mainDict = json["main"] as! JSONDict
var weatherList = json["weather"] as! [JSONDict]
var weatherDict = weatherList[0]
let weather = Weather(
city: json["name"] as! String,
currentTemp: mainDict["temp"] as! Float,
conditions: weatherDict["main"] as! String
)
return weather
}
let task = session.dataTaskWithURL(url!) { data, response, error in
// first check for a hard error
if let error = err {
NSLog("weather api error: (error)")
}
// then check the response code
if let httpResponse = response as? NSHTTPURLResponse {
switch httpResponse.statusCode {
case 200: // all good!
if let weather = self.weatherFromJSONData(data!) {
NSLog("(weather)")
}
case 401: // unauthorized
NSLog("weather api returned an 'unauthorized' response. Did you set your API key?")
default:
NSLog("weather api returned response: %d %@", httpResponse.statusCode, NSHTTPURLResponse.localizedStringForStatusCode(httpResponse.statusCode))
}
}
}
如果此时你运行,你会收到
2016-07-28 11:25:08.457 WeatherBar[49688:1998824] Optional(WeatherBar.Weather(city: "Seattle", currentTemp: 51.6, conditions: "Clouds"))
struct Weather: CustomStringConvertible {
var city: String
var currentTemp: Float
var conditions: String
var description: String {
return "(city): (currentTemp)F and (conditions)"
}
}
再运行试试。
protocol WeatherAPIDelegate {
func weatherDidUpdate(weather: Weather)
}
init(delegate: WeatherAPIDelegate) {
self.delegate = delegate
}
let task = session.dataTaskWithURL(url!) { data, response, error in
// first check for a hard error
if let error = err {
NSLog("weather api error: (error)")
}
// then check the response code
if let httpResponse = response as? NSHTTPURLResponse {
switch httpResponse.statusCode {
case 200: // all good!
if let weather = self.weatherFromJSONData(data!) {
self.delegate?.weatherDidUpdate(weather)
}
case 401: // unauthorized
NSLog("weather api returned an 'unauthorized' response. Did you set your API key?")
default:
NSLog("weather api returned response: %d %@", httpResponse.statusCode, NSHTTPURLResponse.localizedStringForStatusCode(httpResponse.statusCode))
}
}
}
class StatusMenuController: NSObject, WeatherAPIDelegate {
...
var weatherAPI: WeatherAPI!
override func awakeFromNib() {
...
weatherAPI = WeatherAPI(delegate: self)
updateWeather()
}
...
func weatherDidUpdate(weather: Weather) {
NSLog(weather.description)
}
...
func fetchWeather(query: String, success: (Weather) -> Void) {
修改fetchWeather内容
let task = session.dataTaskWithURL(url!) { data, response, error in
// first check for a hard error
if let error = err {
NSLog("weather api error: (error)")
}
// then check the response code
if let httpResponse = response as? NSHTTPURLResponse {
switch httpResponse.statusCode {
case 200: // all good!
if let weather = self.weatherFromJSONData(data!) {
success(weather)
}
case 401: // unauthorized
NSLog("weather api returned an 'unauthorized' response. Did you set your API key?")
default:
NSLog("weather api returned response: %d %@", httpResponse.statusCode, NSHTTPURLResponse.localizedStringForStatusCode(httpResponse.statusCode))
}
}
}
func updateWeather() {
weatherAPI.fetchWeather("Seattle, WA") { weather in
NSLog(weather.description)
}
}
运行一下,确保都正常。
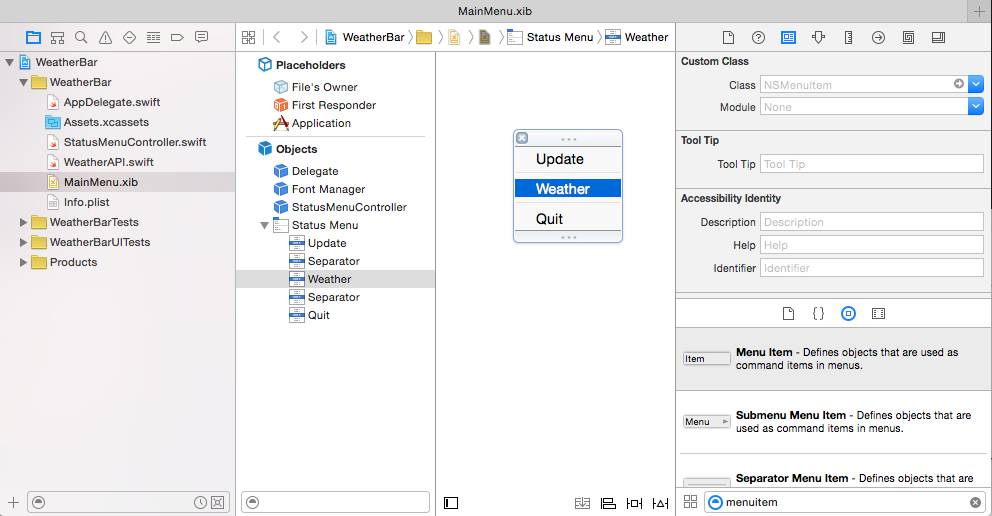
在MainMenu.xib中添加子菜单 “Weather”(你可以添加2个Separator Menu Item用于子菜单分割线)
在updateWeather中,替换NSLog:
if let weatherMenuItem = self.statusMenu.itemWithTitle("Weather") {
weatherMenuItem.title = weather.description
}
运行一下,看看天气是不是显示出来了。
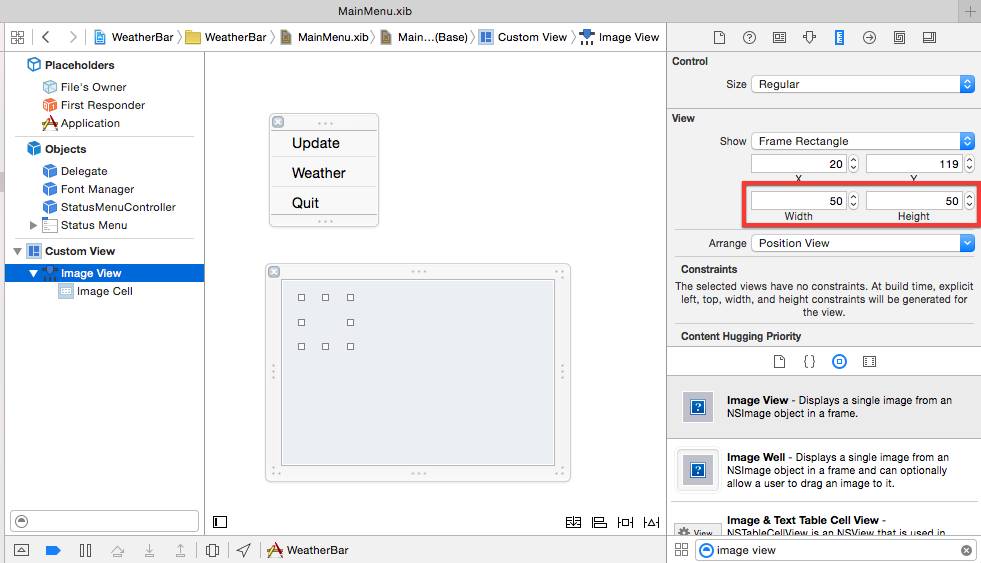
打开MainMenu.xib,拖一个Custom View进来。
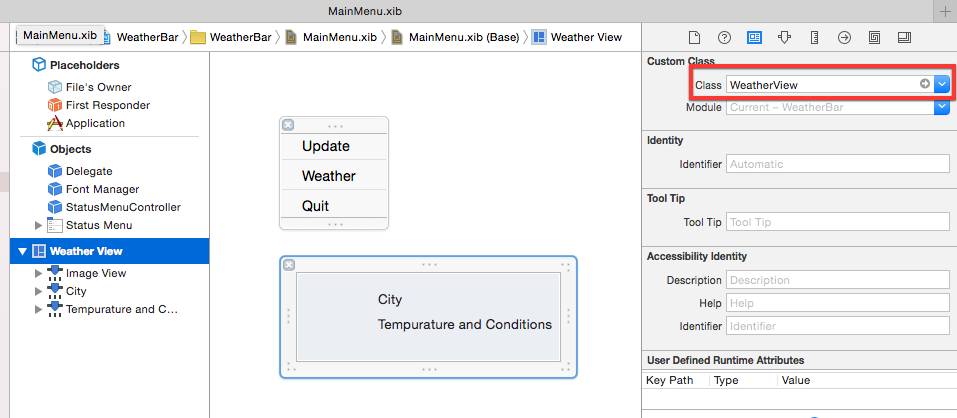
import Cocoa
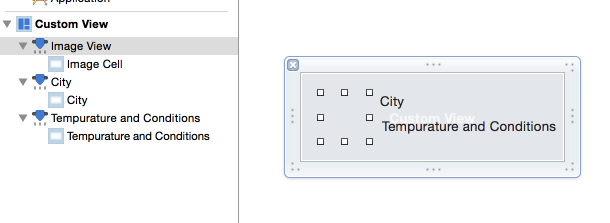
class WeatherView: NSView {
@IBOutlet weak var imageView: NSImageView!
@IBOutlet weak var cityTextField: NSTextField!
@IBOutlet weak var currentConditionsTextField: NSTextField!
}
func update(weather: Weather) {
// do UI updates on the main thread
dispatch_async(dispatch_get_main_queue()) {
self.cityTextField.stringValue = weather.city
self.currentConditionsTextField.stringValue = "(Int(weather.currentTemp))°F and (weather.conditions)"
self.imageView.image = NSImage(named: weather.icon)
}
}
注意这里使用dispatch_async调用UI线程来刷新UI,因为后面调用此函数的数据来源于网络请求子线程。
class StatusMenuController: NSObject {
@IBOutlet weak var statusMenu: NSMenu!
@IBOutlet weak var weatherView: WeatherView!
var weatherMenuItem: NSMenuItem!
...
weatherMenuItem = statusMenu.itemWithTitle("Weather")
weatherMenuItem.view = weatherView
func updateWeather() {
weatherAPI.fetchWeather("Seattle, WA") { weather in
self.weatherView.update(weather)
}
}
运行一下。
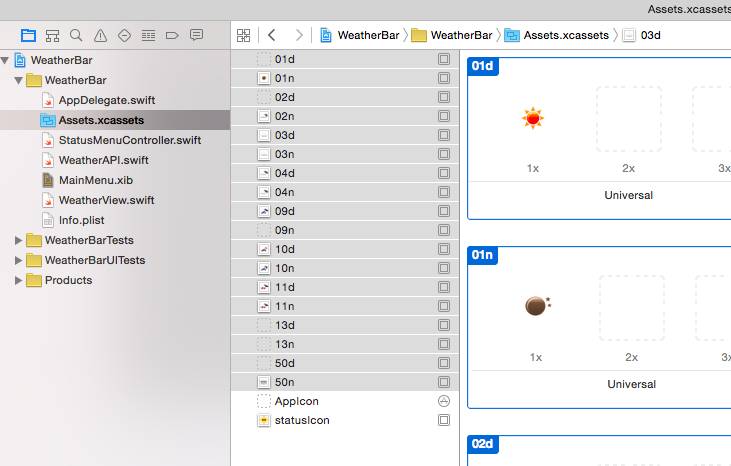
先添加天气素材到Xcode,天气素材可以在http://openweathermap.org/weather-conditions 这里找到。这里我已经提供了一份icon zip, 解压后放Xcode。
let weather = Weather(
city: json["name"] as! String,
currentTemp: mainDict["temp"] as! Float,
conditions: weatherDict["main"] as! String,
icon: weatherDict["icon"] as! String
)
let weather = Weather(
city: json["name"] as! String,
currentTemp: mainDict["temp"] as! Float,
conditions: weatherDict["main"] as! String,
icon: weatherDict["icon"] as! String
)
imageView.image = NSImage(named: weather.icon)
运行一下,Pretty!
在MainMenu.xib MenuItem中,添加一个Menu Item命名为“Preferences…”
并绑定action,命名为“preferencesClicked”
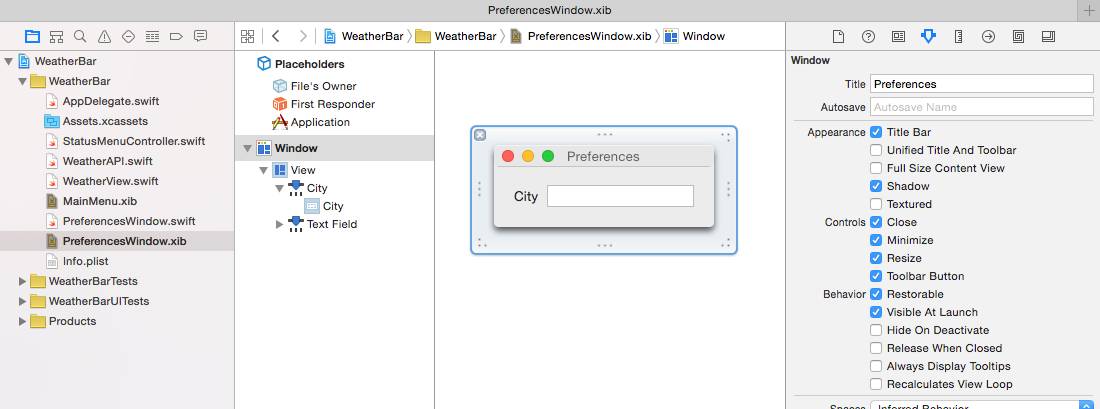
Outlet cityTextField到PreferencesWindow.swift
override var windowNibName : String! {
return "PreferencesWindow"
}
self.window?.center()
self.window?.makeKeyAndOrderFront(nil)
NSApp.activateIgnoringOtherApps(true)
import Cocoa
class PreferencesWindow: NSWindowController {
@IBOutlet weak var cityTextField: NSTextField!
override var windowNibName : String! {
return "PreferencesWindow"
}
override func windowDidLoad() {
super.windowDidLoad()
self.window?.center()
self.window?.makeKeyAndOrderFront(nil)
NSApp.activateIgnoringOtherApps(true)
}
}
var preferencesWindow: PreferencesWindow!
preferencesWindow = PreferencesWindow()
preferencesWindow.showWindow(nil)
class PreferencesWindow: NSWindowController, NSWindowDelegate {
并增加
func windowWillClose(notification: NSNotification) {
let defaults = NSUserDefaults.standardUserDefaults()
defaults.setValue(cityTextField.stringValue, forKey: "city")
}
增加协议:
protocol PreferencesWindowDelegate {
func preferencesDidUpdate()
}
增加delegate:
var delegate: PreferencesWindowDelegate?
在windowWillClose最下面调用
delegate?.preferencesDidUpdate()
回到StatusMenuController中,添加PreferencesWindowDelegate
class StatusMenuController: NSObject, PreferencesWindowDelegate {
实现代理:
func preferencesDidUpdate() {
updateWeather()
}
awakeFromNib中:
preferencesWindow = PreferencesWindow()
preferencesWindow.delegate = self
let DEFAULT_CITY = “Seattle, WA”
func updateWeather() {
let defaults = NSUserDefaults.standardUserDefaults()
let city = defaults.stringForKey("city") ?? DEFAULT_CITY
weatherAPI.fetchWeather(city) { weather in
self.weatherView.update(weather)
}
}
let defaults = NSUserDefaults.standardUserDefaults()
let city = defaults.stringForKey("city") ?? DEFAULT_CITY
cityTextField.stringValue = city
运行。一切OK。
其他:
- 你也可以试试使用NSRunLoop.mainRunLoop().addTimer(refreshTimer!, forMode: NSRunLoopCommonModes) 来定时updateWeather.
- 试试点击天气后跳转到天气中心 NSWorkspace.sharedWorkspace().openURL(url: NSURL))
- 完整工程: WeatherBar
参考
来自:CSDN-Cocos2der
http://blog.csdn.net/cocos2der/article/details/52054107
程序员共读整理发布,转载请联系作者获得授权

 【点击成为Android大神】


