女朋友常逛的设计网站这两天页面上多了下雪的效果,于是问我的网站能下雪吗?作为一个程序员我一般会说实现不了,但是作为男朋友,不能说不行。
雪
雪我们可以使用
span
标签和css的径向渐变简单意思一下:
.snow {
  display: block;
  width: 100px;
  height: 100px;
  background-image: radial-gradient(#fff 0%, rgba(255, 255, 255, 0) 60%);
  border-radius: 50%;
}
复制代码
效果如下:
很多雪
一片雪是不够的,成千上万才浪漫,世界上没有两片相同的雪花,所以每片雪都有自己的大小位置速度等属性,为此先创建一个雪花类:
class Snow {
constructor (opt = {}) {
// 元素
this.el = null
// 直径
this.width = 0
// 最大直径
this.maxWidth = opt.maxWidth || 80
// 最小直径
this.minWidth = opt.minWidth || 2
// 透明度
this.opacity = 0
// 水平位置
this.x = 0
// 重置位置
this.y = 0
// 速度
this.speed = 0
// 最大速度
this.maxSpeed = opt.maxSpeed || 4
// 最小速度
this.minSpeed = opt.minSpeed || 1
// 浏览器窗口尺寸
this.windowWidth = window.innerWidth
this.windowHeight = window.innerHeight
this.init()
}
// 初始化各种属性
init () {
this.width = Math.floor(Math.random() * this.maxWidth + this.minWidth)
this.opacity = Math.random()
this.x = Math.floor(Math.random() * (this.windowWidth - this.width))
this.y = Math.floor(Math.random() * (this.windowHeight - this.width))
this.speed = Math.random() * this.maxSpeed + this.minSpeed
}
// 设置样式
setStyle () {
this.el.style.cssText = `
position: fixed;
left: 0;
top: 0;
display: block;
width: ${this.width}px;
height: ${this.width}px;
opacity: ${this.opacity};
background-image: radial-gradient(#fff 0%, rgba(255, 255, 255, 0) 60%);
border-radius: 50%;
z-index: 9999999999999;
pointer-events: none;
transform: translate(${this.x}px, ${this.y}px);
`
}
// 渲染
render () {
this.el = document.createElement('div')
this.setStyle()
document.body.appendChild(this.el)
}
}
复制代码
init
方法用来生成随机的初始大小、位置、速度等属性,在浏览器窗口内
new
100片试试:
let snowList = []
for (let i = 0; i 100; i++) {
    let snow = new Snow()
    snow.render()
    snowList.push(snow)
}
复制代码
效果如下:
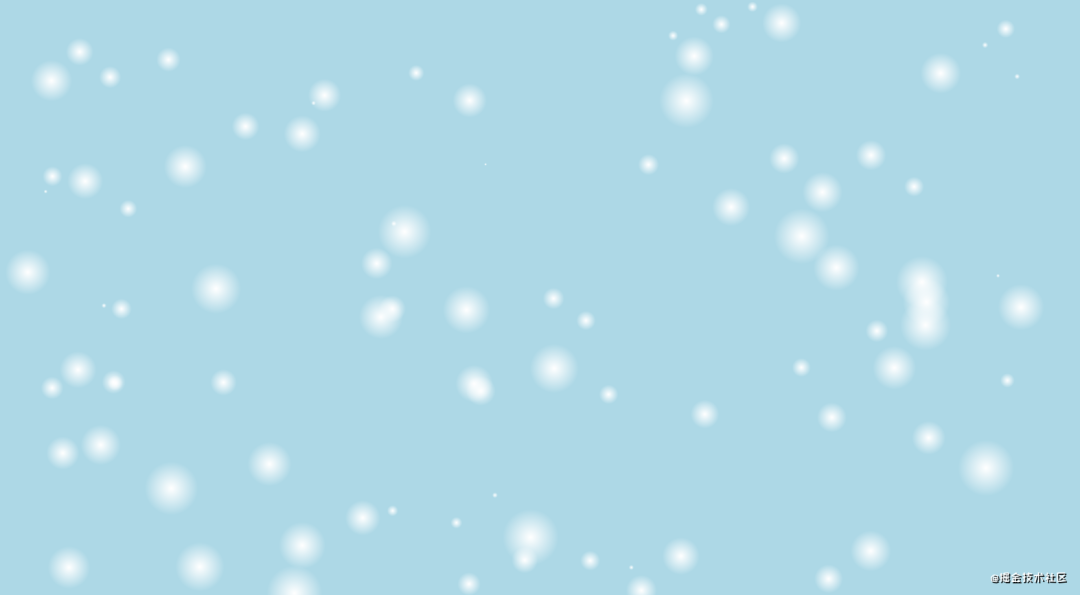
动起来
雪动起来才能叫下雪,动起来很简单,不断改变
x
和
y
坐标就可以了,给
snow
类加个运动的方法:
class snow {
move () {
this.x += this.speed
this.y += this.speed
this.el.style.left = this.x + 'px'
this.el.style.top = this.y + 'px'
}
}
复制代码
接下来使用
requestAnimationFrame
不断刷新:
moveSnow () {
    window.requestAnimationFrame(() => {
        snowList.forEach((item) => {
            item.move()
        })
        moveSnow()
    })
}
复制代码
效果如下,因为速度是正数,所以整体是往右斜的:

可以看到动起来了,但是出屏幕就不见了,所以雪是会消失的对吗?要让雪不停很简单,检测雪的位置,如果超出屏幕了就让它回到顶部,修改一下
move
方法:
move () {
    this.x += this.speed
    this.y += this.speed
    // 完全离开窗口就调一下初始化方法,另外还需要修改一下init方法,因为重新出现我们是希望它的y坐标为0或者小于0,这样就不会又凭空出现的感觉,而是从天上下来的
    if (this.x this.width || this.x > this.windowWidth || this.y > this.windowHeight) {
      this.init(true)
      this.setStyle()
    }
    this.el.style.left = this.x + 'px'
    this.el.style.top = this.y + 'px'
  }
复制代码
init (reset) {
    // ...
    this.width = Math.floor(Math.random() * this.maxWidth + this.minWidth)
    this.y = reset ? -this.width : Math.floor(Math.random() * this.windowHeight)
    // ...
  }
复制代码
这样就能源源不断的下雪了:

优化
1.水平速度
水平和垂直方向的速度是一样的,但是看起来有点太斜了,所以调整一下,把水平速度和垂直速度区分开来:
class Snow {
constructor (opt = {}) {
// ...
// 水平速度
this.sx = 0
// 垂直速度
this.sy = 0
// ...
}
init (reset) {
// ...
this.sy = Math.random() * this.maxSpeed + this.minSpeed
this.sx = this.sy * Math.random()
}
move () {
this.x += this.sx
this.y += this.sy
// ...
}
}
复制代码
2.左下角没有雪
因为整体向右倾斜,所以左下角大概率没有雪,这可以通过让雪随机出现在左侧来解决:
init (reset) {
  // ...
  this.x = Math.floor(Math.random() * (this.windowWidth - this.width))
  this.y = Math.floor(Math.random() * (this.windowHeight - this.width))
  if (reset && Math.random() > 0.8) {// 让一小部分的雪初始化在左侧
    this.x = -this.width
  } else if (reset) {
    this.y = -this.width
  }
  // ...
}
复制代码
3.眼前的雪
随机性的选择一点雪给它较大的体积、透明度和速度,然后再使用
css3
的
3D
透视效果,把它的
z
轴数值调大一点,这样的感觉就好像是在眼前划过的一样:
<body style="perspective: 500;-webkit-perspective: 500">body>
复制代码
class Snow {
constructor (opt = {}) {
// ...
// z轴数值
this.z = 0
// 快速划过的最大速度
this.quickMaxSpeed = opt.quickMaxSpeed || 10
// 快速划过的最小速度
this.quickMinSpeed = opt.quickMinSpeed || 8
// 快速划过的宽度
this.quickWidth = opt.quickWidth || 80
// 快速划过的透明度
this.quickOpacity = opt.quickOpacity || 0.2
// ...
}
init (reset) {
let
isQuick = Math.random() > 0.8
this.width = isQuick ? this.quickWidth : Math.floor(Math.random() * this.maxWidth + this.minWidth)
this.z = isQuick ? Math.random() * 300 + 200 : 0
this.opacity = isQuick ? this.quickOpacity : Math.random()
// ...
this.sy = isQuick ? Math.random() * this.quickMaxSpeed + this.quickMinSpeed : Math.random() * this.maxSpeed + this.minSpeed
// ...
}
move () {
// ...
this.el.style.transform = `translate3d(${this.x}px, ${this.y}px, ${this.z}px)`
}
}
复制代码
4.鹅毛大雪
雪花嘛,轻如鹅毛,鹅毛是怎么飘的?是不是左右摆动的飘?那我们也可以选择一部分的雪花让它跟鹅毛一样飘,左右摇摆很简单,速度一会加一会减就可以了:
class Snow {
  constructor (opt = {}) {
    // ...
    // 是否左右摇摆
    this.isSwing = false
    // 左右摇摆的步长
    this.stepSx = 0.03
    // ...
  }

  // 随机初始化属性
  init (reset) {
    // ...
    this.isSwing = Math.random() > 0.8
    // ...
  }

  move () {
    if (this.isSwing) {
      if (this.sx >= 1 || this.sx <= -1) {
        this.stepSx = -this.stepSx
      }
      this.sx += this.stepSx
    }
    // ...
  }
}
复制代码

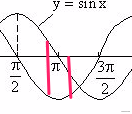
除了上述这种方法,左右摇摆还有一种方式,就是使用正弦或余弦函数,因为它们的曲线翻转90度就是左右摇摆:
 img
img
我们使用正弦函数,公式为:
y=sin(x)
,
x
的值是弧度表示,只要一直增加就可以了,
y
的值用来修改雪花的水平方向的速度变化步长:
class Snow {
  constructor (opt = {}) {
    // ...
    // 是否左右摇摆
    this.isSwing = false
    // 左右摇摆的正弦函数x变量
    this.swingRadian = 0
    // 左右摇摆的正弦x步长
    this.swingStep = 0.01
    // ...
  }

  init (reset) {
    // ...
    this.swingStep = 0.01 * Math.random()
  }

  move () {
    if (this.isSwing) {
      this.swingRadian += this.swingStep
      this.x += this.sx * Math.sin(this.swingRadian * Math.PI) * 0.2
    } else {
      this.x += this.sx
    }
    // ...
  }
}
复制代码
因为正弦函数
y
的值是从1变化到-1,摆动幅度太了,所以乘了个小数
0.2
缩小一点,想要幅度小一点,还有一个方法是不要使用整个正弦曲线,可以从中截取一个适合的区间大小,比如就让
x
的值在
0.9π
到
1.1π
之前变化:
class Snow {
  constructor (opt = {}) {
    // ...
    // 是否左右摇摆
    this.isSwing = false
    // 左右摇摆的正弦函数x变量
    this.swingRadian = 1// 需要改成一个中间值
    // 左右摇摆的正弦x步长
    this.swingStep = 0.01
    // ...
  }

  init (reset) {
    // ...
    this.swingStep = 0.01 * Math.random()
    this.swingRadian = Math.random() * (1.1 - 0.9) + 0.9// 也让它随机一下
  }

  move () {
    if (this.isSwing) {
      if (this.swingRadian > 1.1 || this.swingRadian 0.9) {
        this.swingStep = -this.swingStep
      }
      this.swingRadian += this.swingStep
      this.x += this.sx * Math.sin(this.swingRadian * Math.PI)
    } else {
      this.x += this.sx
    }
    // ...
  }
}
复制代码
5.下的慢一点
既然给水平加了曲线,垂直方向上是不是也可以改成非匀速呢?当然可以,区别是速度得一直是正的,不然就要出现反自然现象了,改变速度曲线同样可以使用正余弦,上面我们使用了
0.9π
到
1.1π
之间的正弦曲线,根据上图可以发现对应的余弦曲线都是负的,趋势是先慢后快,所以可以利用这一段来改变垂直方向的速度:
move () {
  if (this


